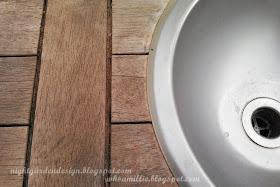
It made sense, really, to use something we already had back there, and this hardwood outdoor bar was a logical choice. We've had it for about seven years now; we use it occasionally for backyard barbecues, but not much else. I talked it over with the Mr., deciding finally that adding a sink wouldn't ruin the bar's usefulness, but add to it.
After measuring the bar to determine sink size, the next step was to scavenge for a sink. Bring Recycling was my first stop; they have dozens of sinks over there, and the kiddo and I considered several hefty porcelain-coated cast iron antiques before finally choosing a simple stainless steel bowl sink for its light weight. We picked a faucet, too, then headed over to the hardware store for various connectors, a length of hose, and some plumber's putty.
It had been suggested to simply cap off one of the brass water supply hoses to avoid the added plumbing work required for two; it was a suggestion that made sense, since we wouldn't be running hot water to the backyard anyway.
Capping it off is pretty easy. We found the right size threaded cap at the hardware store, put a little plumber's putty on the threaded brass water supply line, then screwed the cap on. Easy peasy.


The hose coupler is equally simple. It has two female ends, one that fits over the other brass water supply, and the other, larger end to fit over the hose. We eventually used plumber's putty on this area as well.
I cleaned the wood with a scrub brush, water, and some spray cleaner, then I used the sink turned upside down to trace the hole we'd have to cut.
To support the lip of the sink bowl, I traced a second line about 3/4 inch inside the first. This was our cut line.
I wasn't too worried about perfection; as long as the lip of the sink bowl covers the hole and is well-supported, I'm happy.
I'm not too fond of the reciprocating saw as there's a bit too much motor movement to use a blade that big with a kid running around in the yard with me. I waited until the weekend and the Mr. ended up cutting it out for me. And it looked awesome, set in place, like it was meant for this bar.
After testing for fit, I popped the sink back out and stained the top, since the weather had really worn down the previous finish. Then I put the sink back in place so we could get the faucet lined up right.
The yellow paper is one of the paper templates that I made up for each of three faucets to test for fit, and to help drill the holes in the right places. The original faucet I'd picked out had been too wide at the base, and the faucet was a little on the short side (sad trombone).
We tried out a couple more, finally settling on a faucet that fits pretty well. It doesn't have the two-handles I'd prefer, but the base is a tiny bit narrower and the faucet is a bit longer, so it works out pretty well.
This is what it looks like underneath. The hose lead connects to a y-splitter at the house (so we can still use another hose to water the garden). The black drain pipe drains into a bucket for the time being, to be used for watering plants, etc. The Mr. has some big ideas about adding more plumbing under there and a run-off hose, but I'm happy with this set up for now.
I caulked around the sink and faucet, and also some of the crevices along the surface. It's clear caulk, but it hasn't fully cured yet. I'll try to get an update shot in here once it's fully cured, but in the meantime, here it is, all finished and useful.
Thanks for reading!
Linking up to:
My Repurposed Life
Lou Lou Girls


What will catch the waste water from the sink? I do not see an opening in the cabinet to empty a bucket. Looks great!
ReplyDeleteGreat idea! Pinned. Thanks so much for being a part of our party! Please join us tonight at 7 pm. We love having YOU! http://loulougirls.blogspot.com/
ReplyDeleteHappy Monday! Lou Lou Girls
Hi Janet! We have a large 5-gallon bucket back there right now, and I pull the bar out and empty the bucket when it gets full. After living with it for a couple of weeks now, I can tell you it's not ideal. We're working on a solution!
ReplyDelete