This project is a true labor of love for me. I am a huge fan of vintage signs, old typefaces, and do-it-yourself projects. Like some crazy Venn diagram, this marquee letter project is at the intersection of all of these interests.
See? Told you.
Using Pinterest,
I've pinned several marquee letter projects and products over the past couple of months, intending to try out a couple of different diy methods and typefaces.
(1) I love this
bright red, circus-y, 24-inch high version from Urban Outfitters, but $179 is out of my budget for wall art right now.
(2) These
white, artisan-made "marquis" letters from Sideshow Sign Company are even more gorgeous, but at $545, they're also a no-go.
(3) This tutorial from chrisandjinny.com uses plywood and aluminum flashing, and I love it. I think it's my favorite of the tutorials on my Pinterest board, but I need to feel more comfortable with a jigsaw before I can take it on. That also goes for
(4) this
Design*Sponge/Curbly project which utilizes hardboard, dowels, and vinyl flashing.
(5) Finally,
this foam core board version from Design*Sponge seems the easiest to pull off with limited resources. So it's next on my list.
After visiting the craft store, I wanted to try using paper mache letters (similar to
the ones linked to here). Unfortunately, there were only four letters in stock at the store. I mean, one each of M, N, L, and K. With no more on the horizon (I was told they were a inter-store return of products from a "superstore", and this branch wouldn't be carrying them).
But why not try this project using only materials I had on hand?
Okay then. Homemade paper mache it is.
Materials needed:
*Old cardboard mailer
*Old paper sacks
*Scissors
*Mod Podge
*Glue Gun
*Paintbrush
*Poster board
*Acrylic paint
*Spray paint
*Cut tacks
*Drill
*LED light string
Total cost: nothing out of pocket, since I had everything on hand.
You can trace or free-hand a letter of your choice onto a used shipping box, and cut it out. My letter is approximately fifteen inches high, and was free-hand drawn while looking at an old Hardy Boys novel from the 1920s.
Cut some 2-inch strips from the remainder of your mailer. The corrugations should run as pictured, which is to say, perpendicular to the long cuts. Bend along each corrugation to make the cardboard sides more pliable, and able to fit into your letter's small crevices.
Using a glue gun, attach the sides to your letter, leaving an even border of 1 inch on front and back. Overlap seams for sturdiness.
Using Mod Podge or another paper mache or decoupage medium, cover your letter with layers of brown paper sack. Smooth all edges for best possible finish. Let dry.
Cut out poster board (or colored paper) to fit, both front and back.(Oops! Mine has a tear where the tag came off.)
Use Mod Podge on front and back of poster board cut-outs to hold them in place.
Shinier!
When the Mod Podge is dry, cover the red with scrap paper cut-outs to prep for spray paint.
I had a partial can of aluminum color spray paint and a partial can of hammered metal spray pain leftover; the first coat of aluminum was too foil-y looking, so I painted over it with the hammered metal.
Remove the scrap paper. I used a crackle finish medium (sparingly) in a couple of spots on the front, and painted over with some dark red acrylic paint. You can skip these steps if your poster board is the color you want it to be, and you didn't mark it up when you tore off the sticker. I used the crackle medium to add the illusion of age, but it's a pretty subtle effect, and not necessary. (Click to enlarge photo.)
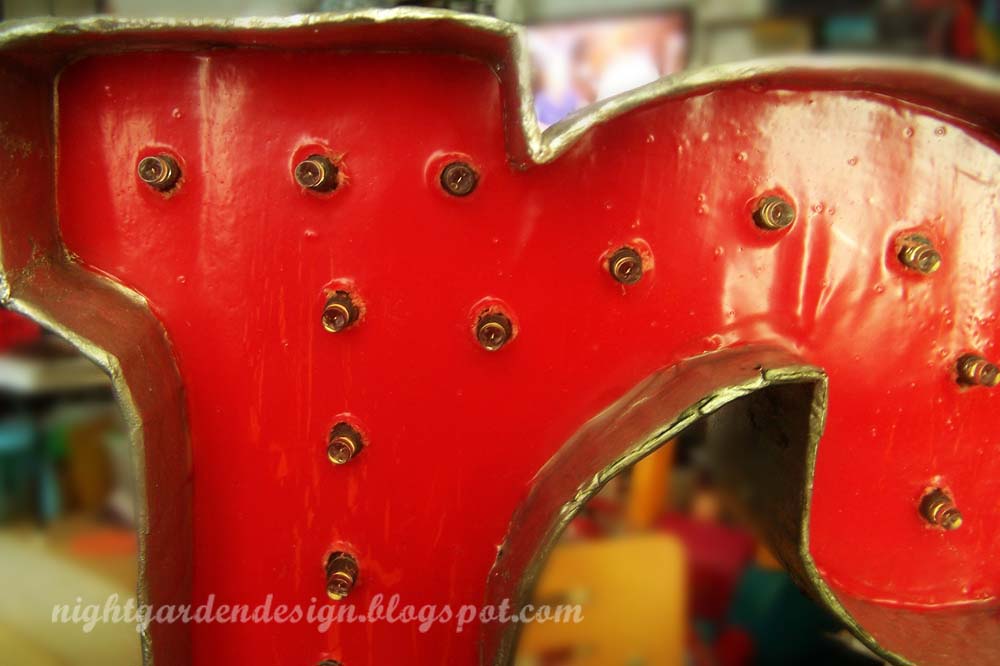
I pushed in some silver-colored cut tacks along the outside for effect; still not sure I'm a fan. I also used some acrylic paint on a couple of places (finger-painted on) for a verdigris effect; not sure I like that, either. I might re-do that later.
I poured in some more Mod Podge for a smooth, glossy, varnish-look appearance, without brush strokes.
Then I waited three days for it to dry. Aack.
If you skipped the various crackle/paint/Mod Podge/wait steps, you can get right to drilling your holes. If not, well, you're at the point now when you can drill anyway. Decide how many lights you'll use (my solar-powered string had 20), plan/mark your placement, and drill slowly. Don't apply too much pressure, or you might loosen the joints of your paper mache.
Brush off the "sawdust".
Push your lights in from the back. I used small LED twinkle lights, so I just pushed the whole light through the hole. I don't necessarily recommend using regular incandescent light strings on a cardboard project, but if you use larger, round-bulb LEDs, remove the bulbs before inserting the sockets into the drilled holes, then reattach the bulbs on the other side.
Front view, with all bulbs inserted.
And here's the finished project all lit up after charging the solar battery pack.
As I mentioned above, this was a test project to see what I could put together with materials I had on hand, and so I'm fairly happy with it. But I'm definitely motivated to try this project again using different materials.
If you go the paper mache route like I did here, there are a few things I'd recommend doing differently.
(1) Mod Podge paper mache doesn't dry as hard as regular flour-&-water-glue (a.k.a. wheat paste) paper mache, so you might find your letter is more flexible than if you used wheat paste. The other method would also be less expensive!
(2) Using corrugated cardboard for the border makes the "metal" border a little less believable, I think. I'd keep the corrugated for the letter shape, but do the borders using old cereal boxes or tag board.
(3) Red poster board + Mod Podge + crackle medium + red paint + more Mod Podge is too many steps, in my opinion. I'd streamline this a little, and either use red vinyl instead of poster board, or I'd take better care of my poster board and stop after the first Mod Podge-ing. Or use red lacquer or something.
I think those are the main alterations I'd make, but there'll be more attempts at this made. I'll be sure to post about those experiments, too, so please follow my blog to make sure you see those upcoming efforts!
Thanks for reading! You can make these images larger just by clicking on them, but you probably already knew that. ;)
Linking up for the Young House Love / Bower Power Pinterest Challenge!
Sherry,
Katie,
Kate, and
Michelle