Showing posts with label paper. Show all posts

Monday, August 10, 2015

fast and easy paper making for kids!

If you have a preschool-aged kid (or older) with an interest in recycling, this is a fun afternoon project! Let's make some paper!

Take scrap paper and, with your kid, tear it up and put it in a blender with some hot water. We used a couple of mis-printed sheets from the printer, a bit of cardboard, two pieces of junk mail, and a sheet of purple construction paper. The trick is: the blender blades have to turn freely, so don't jam-pack the blender and use lots of water.

Blend till pulpy.


Kids can pour into the screen! We actually did the pouring over a catch-basin, then moved it to the table.


Kids can sponge gently to remove excess water. Here, my now-gigantic, soon-to-be-kindergartener kiddo sponges our screened paper.
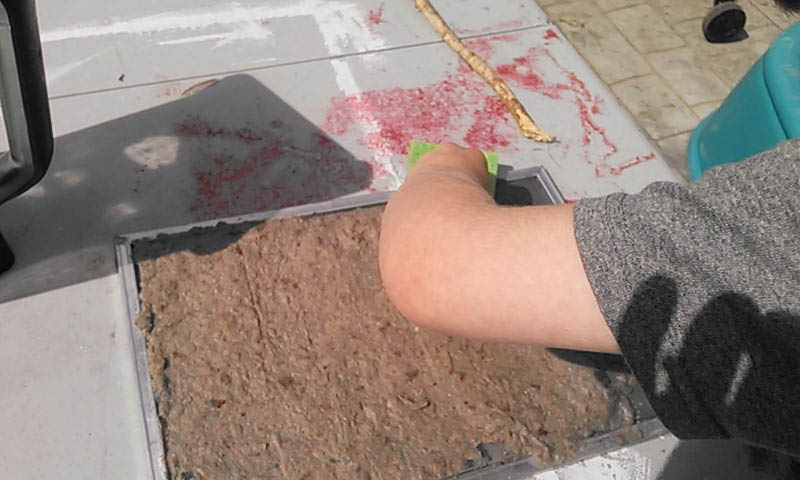


Flip it over on felt, polyester, or polypropylene cloth (heck, linen would probably work, too), then press from the back with a sponge (kids can do this part, too!) (The kiddo is developing his photography skills; these are nicely framed, I think.)


Carefully lift screen, helping paper separate by pulling gently on the corner. Once the  entire screen is separated from the paper, leave it to dry.


And once it's dry, you can cut it into two equal pieces . . . or more.

The resulting paper will vary in thickness and texture, depending on your pour, and color, depending on your source materials. Ours feels a little like egg carton cardboard.

Nice textural quality; the screen leaves crosshatch marks on the surface, which look great when rubbed with a crayon.  

And that's all there is to it! The materials used don't have to be expensive. We used a small window screen from the recycled building materials store (99 cents), some kitchen sponges, and a polypropylene sack.  Serviceable and fun for a summer project! 

We're going to try this at the preschool's day camp this month, too, but using hand mixers; the low-tech kind with a hand crank (go go fine motor skills!). I'll try to remember to post the results for those who want to give it a try!

Thanks for stopping by!

-a

Wednesday, July 8, 2015

hometown tourist: the vintage industry

Okay! So. That was an unexpected hiatus. Have I mentioned I was on the board of directors at my kiddo's preschool this year? I volunteered to be the publicity lead, which was great. And also a lot of work. I made some great stuff this year, and I want to share it all with you, but I'm going to take it easy as I make my reentry into blogging.

Having dropped the kiddo off at day camp for a couple of hours, I went on an errand binge. The last place I stopped wasn't on my list, but it's one of those places I always want to stop until I do some mental math and calculate the cost of imaginary damages my offspring might commit.


The Vintage Industry is kind of an antique mall, with separate stalls set up for different vendors. It's just floor to ceiling packed (two floors), and many of the vendors have an amazing ability to style their spaces. A few, not so much, but in every corner there's good stuff to find: mother-of-pearl buttons, embroidered handkerchiefs, library drawers, locker baskets . . . Okay, I'll shut up now and disgorge the cell phone pics (it's true; I'll never learn).


Located on 21st + Main in Springfield, Oregon.

Saturday, May 17, 2014

fairy flower surprise gift (giant tissue paper flower)


These make a nifty way to present a tiny gift to someone special, whatever the occasion.  Extra large fairy flowers are an especially nice way to package costume jewelry for kids' birthdays; this one, for example, concealed a comically large metallic ring with a huge purple plastic gemstone for a girl who loves fairies.

I think these flowers make a nice gift in themselves, as well, or pretty awesome party favors. They're also versatile, easy to make, and use materials that are reasonably easy to find.


Start with six squares of tissue paper. To make the largest flower possible, use full-sized sheets of tissue with an end cut off to make a square. For smaller flowers, use smaller squares of paper. I used two sheets each of green, pink, and yellow, but you can alter the colors to match your theme.


Stack them up, and make one-inch wide accordion folds from one end of the stack to the other.


Use scissors to round the ends of the folded stack, then use a green pipe cleaner (aka chenille stem) to cinch the stack at the middle.


Carefully separate the layers of paper, gently pulling and shaping them up and towards the center to look like petals and leaves.


Use a length of 20 gauge steel wire to make a long stem, and use it to follow the green pipe cleaner around the center of the flower.


At the flower's base, twist the pipe cleaner and stem wire together, then wrap the entire stem with patterned washi tape or masking tape. The stem should be sturdy enough to hold the flower upright.


The center will be where you place the bundled present! Wrap your gift in layers of tissue paper and twist the top. Use two short lengths of pink chenille stems to twist around the top of the bundle, curling the ends.


Apply a rolled piece of the patterned masking tape or a piece of double-sided tape to the bottom of the bundle. (Hint: If you're planning on traveling very far or the jewelry is very expensive, I'd attach the bundle with hot glue instead of tape.)
 

Insert the bundle into the flower's center and press hard to secure it in place. Make sure to include a line in an attached card to let the recipient of the gift know to check the center of the flower for a hidden surprise!


If you plan to make a bunch of these as party favors, you can cut up to a dozen sheets of paper into squares at once to save time, and then build the flowers assembly-line style.


Thanks for reading!

Tuesday, February 18, 2014

paperman inspired love


Inspired by the 2012 animated short Paperman and all the flying machine party prep, I made this watercolor pencil art.


It happened to be ready weeks before Valentine's Day, too! I hope yours was lovely.

Thursday, February 6, 2014

paper airplane party invitations


Printed on vintage accounting ledger paper.

Airmail graphics for label and stamp are from The Graphics Fairy, and were printed separately on label paper and attached to the airplanes like stamps. ("6 cents" was changed to "4 cents" in Photoshop.)

Postmark is a combination of several glyphs from a font called Dead Letter Office available free from daFont, altered in Photoshop.

Text typeset in Helvetica (all caps, outlined) and Trixie.

I had brainstormed ideas for invitations for my kiddo's Flying Machines party and came up with the idea of a paper airplane invitation that looked like Air Mail. A quick search revealed that it's not a unique idea. Boo hiss. I used this design from Country Living Magazine as a template for my planes, although the result is pretty different.

If you like these but don't want to invest the time to create your own, please e-mail me. I can create a version with your child's name and party details for a reasonable rate, with a 3-day turn-around.

Thanks for reading!


Tuesday, January 21, 2014

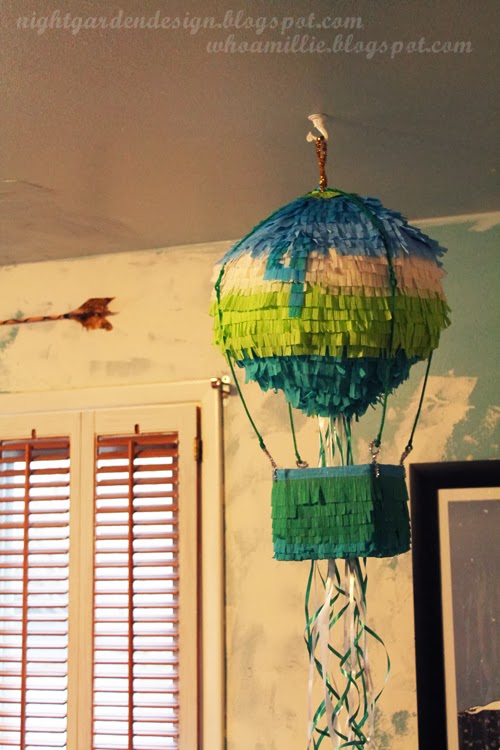
hot air balloon pull-string piñata

We're actually having two piñatas this year for the kiddo's birthday; this one, a hot air balloon, is for his Flying Machines Party with his friends; the other, a motorcycle (saving that for a future post) is something he fell in love with at the grocery store. And because I'm a sucker, I said I'd make him one for his family party as well.

But let's talk about that hot air balloon, hmmm? 

Round paper maché isn't hard to make, really. Just blow up a balloon and coat with layers of paper and paste et voila! After a few days of drying time to make sure your piñata doesn't mold, you have a blank canvas.

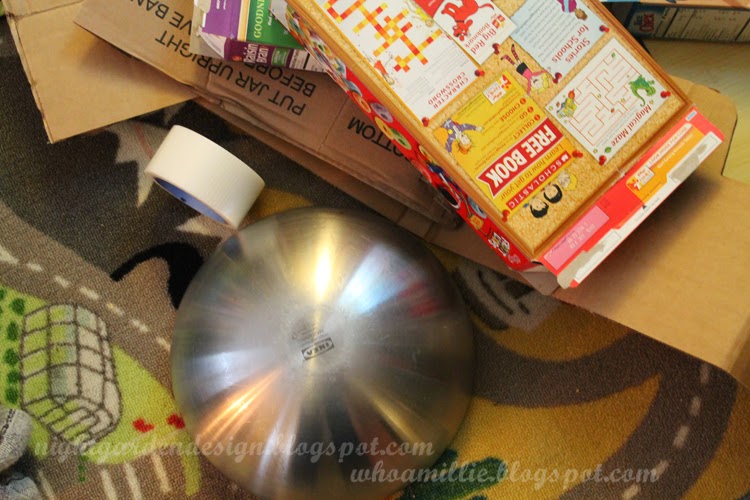
But I've had a thing for simple, dry piñatas the past couple of years, with pull-strings to boot. I started this one with some cardboard boxes, a round metal bowl, a Make-Do cardboard connector, and some duct tape.


After making a strip of sturdy corrugated board for the bottom rim, I cut long petal shapes out of thin, pliable cereal boxes. These are taped to the rim at the bottom . . .


. . . and have holes poked in the top to fit the cardboard connector.


Here's a view of the inside, which on its own makes a pretty cool design.


I made two, one top and one bottom, then attached at the center with more transparent duct tape.


The Make-Do cardboard connector will support the pipe cleaner hanger coming up.


I used thrift store streamers cut into fringe to decorate (this is actually their third life; last year these streamers were streamer chandeliers at the kiddo's robot party). Glue sticks work really well for attaching the strips quickly and cleanly, but regular white craft glue has a good sturdiness factor.


It's good, I think, to have a shot of how the top is finished off. I just loosened the connector a bit and slipped in some strips of un-fringed crepe, attached with glue. Then I tightened the connector back up for a nice, clean finish.


The basket of the hot air balloon is a four-sided box (no top, no bottom) covered inside and out with more streamers.


To get a number or other design, I work with 3/4-inch sections of streamer, cut into two fringes. I just slip them up under the existing rows of fringe and glue in place, then trim to match row length.


A gold pipe cleaner runs through the piñata, through the two holes in the connector (essentially wiring everything together), then wraps around the exposed end and forming a hanging loop.


The basket is also held in place by pipe cleaners. Silver ones poke through holes in the cardboard and make hook eyes on each of the four corners. Two long green pipe cleaners twist together end to end to attach the pieces, looping through the silver hook eyes and around the connector at the top.


 After carefully removing the bottom cardboard connector on the balloon, ribbons are strung through the holes in each petal and knotted + taped in place. After filling, I did a little crepe paper repair work for a seamless finish, then let the ribbons hang down through the hanging basket.


And here it is all finished in one night! One long night, yes, with all that crepe paper work, but still less drying time than a paper maché ball.


We can't wait for all the kids to bust out the treats when the birthday party arrives!