Showing posts with label girl. Show all posts

Thursday, February 6, 2014

paper airplane party invitations


Printed on vintage accounting ledger paper.

Airmail graphics for label and stamp are from The Graphics Fairy, and were printed separately on label paper and attached to the airplanes like stamps. ("6 cents" was changed to "4 cents" in Photoshop.)

Postmark is a combination of several glyphs from a font called Dead Letter Office available free from daFont, altered in Photoshop.

Text typeset in Helvetica (all caps, outlined) and Trixie.

I had brainstormed ideas for invitations for my kiddo's Flying Machines party and came up with the idea of a paper airplane invitation that looked like Air Mail. A quick search revealed that it's not a unique idea. Boo hiss. I used this design from Country Living Magazine as a template for my planes, although the result is pretty different.

If you like these but don't want to invest the time to create your own, please e-mail me. I can create a version with your child's name and party details for a reasonable rate, with a 3-day turn-around.

Thanks for reading!


Wednesday, January 29, 2014

candy airplane party favors


A big "thank you!" to the blog Sewing Mama Raeanna for inspiring this fast and easy party favor.

Supplies list:
• Wint-o-green Lifesavers 
• rubberbands
• Smarties
• sticks of gum wrapped with scrapbook paper and washi tape (for decoration + sturdiness)


Thread a rubberband through two Lifesavers. If your rubberbands are tiny, you can link two or more together.


Insert a stick of gum through the looped ends sticking out of the Lifesavers.


Insert a roll of Smarties into the space between the gum (wings) and the Lifesavers (wheels). The rubber band will hold everything in place.


Repeat as necessary!


More Flying Machines Party projects:


Sunday, November 24, 2013

just in time for the holidays: 7 diy gift tutorials from my blog


With the holidays coming up, I wanted to put together a quick post for you all featuring links to seven of my most popular DIY gifts! Here they are, in no particular order, so you can spend less time and money at the mall this year, and give gifts that mean a lot to family and friends who mean a lot to you.

1) The Inventor's Supply Kit


Originally made for my nephew, this has been popular on Pinterest this past year. Wanna put one together for someone special? Here's the link.


2) Rupee Crayons


These were party favors for my kiddo's second birthday party, but if you make a mold using the silicone kit I link to, you could make a set for every kid on your gift list. They look awesome, but are really inexpensive and fun. Find the tutorial here.


3) Faucet Handle Coat Rack


If you like upcycling and repurposing (and you have a second-hand building supply store in your area) these make really nice gifts, and they're something you can put together pretty quickly. You can find instructions here.


4) Monster Pillows


Made of scraps of faux fur and felt, these monster pillows are one of my favorite projects to make for a quick birthday or Christmas present. With a single yard of faux fur, you can make four to six 12-inch pillows (depending on the width of the bolt of fabric). Make a few this holiday season using my quick tutorial.


5) Measuring Tape Growth Chart


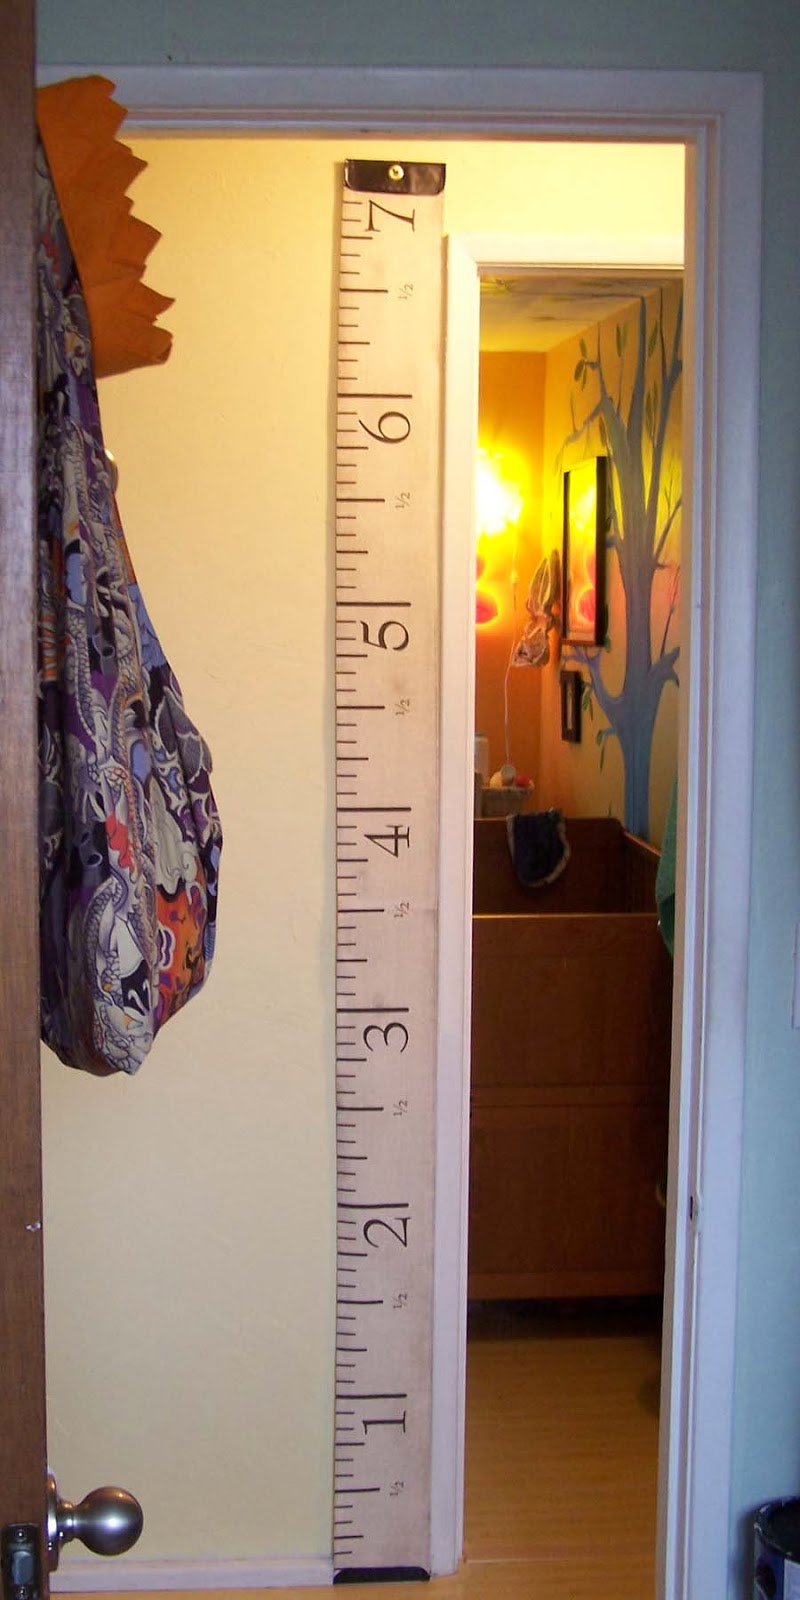
There's still time to order some measuring tape growth chart fabric to put together one of these wall-hangings for someone you love! Spoonflower is about ten days out on orders, but that should still give you a bit of time for assembly if you get your order in soon. (I sell the fabric and finished charts through my Etsy store, too, but my supply is low right now due to holiday orders). Click here for the assembly instructions. Oh, and I have a metric version available, too! (One yard will make 2 1/2 charts, or order single panels directly from me.)


6) Cheap-o Screen Printed T-shirts (or tea towels)


Custom screen printing with mesh fabric, embroidery hoops and latex paint? Yup. Make your own t-shirts this Christmas and knock a bunch of names of of your shopping list.


7) Freezer Paper Printed T-shirts (or tea towels)


This is a great project for one-off prints. In this post, I present a dinosaur t-shirt, and links to other places in my blog where I feature a pretzel shirt, viking t-shirt, and wood-grain flour sack tea towels. Infinitely customizable, without the time investment of making a silkscreen for each design. Find it here.

All right, readers! Go forth and craft like you've never crafted before! Let's do this!

Thursday, October 10, 2013

c is for chasmosaurus

After last week's craft fail, it was nice to have a couple of craft successes. This is one!


This chasmosaurus shirt is part of our gift for an upcoming birthday party this weekend (second part to be featured here, soon!). Our little friend is a big-time dinosaur enthusiast.


Those of you without a Silhouette cutter will be happy to know that this was made without one. I used freezer paper and an X-Acto blade, after first designing the image in Adobe Illustrator. Free dinosaur graphics are everywhere on the internet, though, so it's possible to do this project with other dinosaurs, without Illustrator. Chasmosaurus fans can use this design for your own personal projects (not for sale!).

You can print directly on the freezer paper. Cut it to fit your printer and make sure you'll be printing on the textured "paper" side, not the slick plastic side.

To save ink, I turned the opacity down to 30% so that it would print a light gray instead of black. You could also just print the image in outline, but I like to have a filled-in figure for whatever reason.


After it's printed, cut it out with an extra-sharp X-acto blade on a self-healing mat or a surface you don't care too much about (like an old magazine or a drawing board). The sharpness of the blade is especially important for those tiny letters.

Then iron it on your shirt and paint using a short-bristled brush! As I've mentioned before, the beauty here is that kids can help with the painting part. My kiddo helped paint this for his friend, so the gift is really from his own two hands.


Here are some of my previous freezer paper stencil projects, in case you'd like some more ideas or a bit more step-by-step.

(1) flour sack towels
(2) viking t-shirt
(3) toddler art pretzel shirt

Thanks for reading!

p.s. you can make these images larger just by clicking on them . . . but you probably already knew that, clever you.

Saturday, March 16, 2013

the inventor's supply kit

I was recently looking for a couple of birthday presents for two sweet kids in my family. One, a girl turning eight, is very artistic. Arts & crafts kits for kids her age (especially those targeted at girls) are pretty easy to find, and I'm told she loves these things. I found two (one; two) I thought she'd adore and wrapped them up in a pretty fabric sack I'd made (tutorial coming soon).

The other, a boy turning eleven, was harder to shop for. He's also creative, and has a particularly curious mind when it comes to engineering gadgets and finding out how stuff works. This always impresses me about him.

It's somewhat difficult to find a ready-made kit for someone like him. A lot of science-y kits (even the more expensive ones) cheap out on the supplies, or only provide enough for a limited number of experiments one time through. I don't think that's the best way to encourage the kind of experimentation that engineering and inventing require. Obvious answer: to make an Inventor's Supply Kit of my own invention.


As a pre-internet kid, books were where I always found my answers when I was little. So I found a couple of books I thought would inspire a ton of ideas in his mad-scientist head, and collected a bunch of stuff he'd need to do most, if not all, of the projects in the books. Ta-da! Instant kit.


Well, I mean, not totally instant. You know me. I had to make it look "legit". I also used one of those nice shipping boxes with the red interior that came with a photo book from MyPublisher, and made some graphics and wrapped everything up in brown paper with stickers and striped tape. But mostly instant.


The first book, Kinetic Contraptions, requires hobby motors, which are pretty cheap from on-line retailers until you add in shipping costs. I headed to the thrift store and bought a couple of cheap motorized cars someone had donated. Then I disassembled them and salvaged the motors (full disclosure: the Mister helped loosen some crazy-tight tiny screws). As a bonus, this also yielded a supply of tiny screws, several wheels and axels, gears, and an LED lighting and speaker assembly, all of which are harder to come by than hobby motors.


Some kids would appreciate the opportunity to do the disassembly themselves, but I didn't want to leave any obstacles between the recipient of our gift and the projects in the book. Better, I decided, to give him raw materials to build with from the ground up. He can always pull apart old toys later to salvage more parts if he wants to.


Most of the other supplies came from the dollar store or were pretty inexpensive elsewhere. Here's a list of what I put in the kit (also printed on the graphic inside the box lid):

• 2 books (Amazing Rubber Band Cars and Kinetic Contraptions)
• 2 hobby motors (from RC cars)
• 1 speaker/light assembly (from an old RC car)


• assorted tiny screws
• straws
• bamboo skewers (with the sharp points cut off; I'm creative, not crazy)
• 4 film canisters (from a bunch of rolls of camera film I picked up for my old-timey 35-mm at the thrift store)
• assorted RC car wheels
• wire (leftover from another project)
• 8 AA batteries (the book recommends dollar store batteries, since things are bound to be left connected accidentally, and good batteries drain just as well as cheap ones)


• 36 spring-clamp clothespins
• 3 D batteries (see above)
• 2 spools of electrical tape
• 250 plastic-coated paperclips (which can always be stripped down if the project calls for it)
• 12 binder clips
• spare gears and wheel axels (from old RC cars)
• brads and decorative metal gears
• glue sticks
• rubber bands


I also used a part of a roll of striped orange paper tape from Target's stationary aisle, reused some brown kraft packing paper, and printed some labels on some label paper.


If you find yourself wanting to make one of these kits for a scientist or inventor in your family, I can totally send you a PDF of the graphic for the box top (for personal use only, of course, not for resale). Just send me a message via e-mail or in the comments field below and I'll hook you up!


Thanks for reading!

p.s. you can make these photos larger simply by clicking, but you probably already knew that, clever you!


Linking up to:

Weekend Wrap-Up Party
Getting Schooled Saturday
Strut Your Stuff Saturday
Natasha in Oz
Share It Saturday
Hello Weekend
The Shabby Nest
Mop it Up Mondays
Skip to My Lou


Wednesday, February 1, 2012

girl scout badges in my etsy supply shop

Now for sale in my Etsy art supply shop, bunches of authentic Girl Scout badges from the past decade.


See my complete listings here!

Pin It


(p.s. you can make these photos bigger by clicking on them . . . but you probably knew that!)