Showing posts with label Christmas. Show all posts

Monday, December 15, 2014

evergreen wreath

The kiddo's school has a yearly fundraiser selling locally made (not by us) wreaths. I bought one last year and I bought one this year, and I'm fine with it. The wreaths are pretty and they smell good, and the school gets a nice chunk of the proceeds too, unlike with those magazine and candy sales I did as a kid.

Here's the thing: wreaths are relatively easy to make, and very inexpensive if you have access to evergreens. If you want more than one wreath for your house and school fundraisers are too expensive, give it a go. Here's one I made.


I used rosemary branches, some angry, pokey evergreen branches from a tree out back. and some little cedar twigs that got blown down in a windstorm.


The wire wreath form is from last year's wreath.  It's called a soft clamp wreath frame, if you need to order one. I just used some pliers to pull open the prongs last year, composting the old evergreens and storing the wreath form to recycle this year.


Add branches.
  

Use pliers to cinch everything together.


Tuck additional branches in to cover the wires, and hang it on a nail, ribbon or hook.


My wreaths sometimes look a little asymmetrical, which I like. If you don't, trim yours till it looks right to you.

Okay! That's all from here. Kid's got the flu so I'm off to do another load of laundry. Be well!

Thursday, December 4, 2014

dyeing paper

Hey there campers; it's been awhile!

I thought I'd test the waters with a brief post about dyeing paper for special projects like wedding invitations, book binding or Christmas cards.

I dyed this fuchsia paper for wedding invitation inserts this summer.


You can dye any paper; it's made of plant fiber most of the time, like cotton clothing. High cotton-content paper and paper with linen fiber get the best color, but even regular newsprint or drawing paper can be dyed using Rit Dye or Dylon. (Dylon is my preference.) This color is called Flamingo Pink.

I used a 110 lb arches cold press watercolor paper trimmed to A4 size, then pre-soaked it in a bath of hot water with just a dash of dish soap. I use the dish soap as a nod to my method of dyeing clothes; I always pre-soak and wash to achieve even dyeing by saturating the fabric and removing any waxes, oils, or fixatives. With paper, the saturation is key and the soap, while probably not completely necessary, is just a little bonus to help assure that the saturation is allowed to happen.

I dye paper in my stainless steel kitchen sink. It's easy, large, readily available and unlikely to stain. I boil water and pour it into the plugged sink; just until I have 2 or 3 inches of water in the sink. I add 3 or 4 times the recommended amount of salt and stir until dissolved.


I add the dye before I add the paper, and stir till dissolved. A quarter of a package is a good place to start, since I dye paper in batches. Paper into dye, saturating one side and then the other, eight or ten sheets in the bath at a time. Keep track of how many, as you'll be turning and repositioning the sheets in the bath every ten minutes or so for relatively even dyeing. And repeat until the dye cools or you get a color a couple of shades deeper than your desired result (dyed paper and fabric tend to lighten as the dry).

Of course, the idiosyncrasies of hand-dyeing are often desirable. I like to sprinkle a little dye powder in the bath to add speckles sometimes.


Rinse in cool water, then press gently in a towel,  hang with pipe cleaners ("chenille stems") and clips, and let air dry.

Paper will warp a little as it dries, so ironing will be necessary to run dyed paper through a printer or a printing press. Use a press cloth and turn your iron on the cotton setting, no steam.

Thanks for dropping in as I attempt to get my sea legs back! I hope you'll stop by again soon. I aim to.

Wednesday, January 8, 2014

paul bunyan christmas boxes

You've already seen some of the things I packed into this year's Christmas boxes, including the Paul Bunyan Towel-endar . . .


. . . the saved mammoth sunflower seeds . . .


. . . and the woodsy snow globe ornaments.


So let's look at some of the other stuff that went in the boxes with these goodies. Here's some coconut candied peanuts. I packaged them in triangular treat bags and added gold ties and vintage-style labels. (I should have chosen tree nuts to stay on theme, but I had a momentary lapse)


And here are some bar coasters I printed with a log slice pattern (for fun, some also had a bark pattern on the backs).


These little Paul Bunyan books (Paul Bunyan Comes West, originally published 1928) were my favorite, though. I'll talk more about them in a future post, but here's a sneak peek at them after I bound  them but before they were wrapped and put into the boxes.


I packed everything into a treat box with a window on the top. You'll notice I also enclosed a box of packaged tea and a little parchment paper package of birch branch paper straws.


Then I added some colorful paper shreds I reused out of a Pijon Box delivery. They use a lot, so I had plenty for twelve boxes.


I tucked the Paul Bunyan towels in on top of everything . . .


. . . then sealed up the boxes (bought during last year's post-Christmas clearance) with the towel wrap showing through the window.


Finally, I used some recycled brown paper to print some wrapping paper using the same block I used for the coasters. I tied the packages shut with baker's twine and added more wood veneer tags on top. These ones say, "Paul Bunyan says, 'Merry X-Mas'" in gold pen.


Positive feedback from family and friends! I had a lot of fun, and some frustration, and a few late nights putting everything together this year. I even got boxes in the mail in time for Christmas for those I wouldn't be visiting. Now to start planning for next year . . .

p.s. make photos larger with a click!

Linking up to:


Tuesday, December 3, 2013

the mammoths are back

Packaged up in time for Christmas! The mammoth sunflower seeds I wrote about back in September are back, this time in some little seed packets I printed up.


Designed in Adobe Illustrator, printed with an inkjet printer on charcoal drawing paper and stitched on two sides.

The design work isn't flawless here, but by the time I realized I should have left more space at the top of the envelope, I'd printed the entire run. Which means next year's packets, lesson learned, are going to be impeccable.


The backs are printed with the planting history including family, date, and location that the seeds were grown. We'll save seeds from the biggest flower heads next year and pass those on. Maybe eventually we'll have some real monsters on our hands. 


Sealed up with paper tape from Target and ready to go in this year's gift boxes for the family!

If you want to read about the huge sunflowers we grew this summer, you can read more here!

And just in case you landed here while looking for a story about the cloning of wooly mammoths from frozen DNA, this one's for you

Sunday, November 24, 2013

just in time for the holidays: 7 diy gift tutorials from my blog


With the holidays coming up, I wanted to put together a quick post for you all featuring links to seven of my most popular DIY gifts! Here they are, in no particular order, so you can spend less time and money at the mall this year, and give gifts that mean a lot to family and friends who mean a lot to you.

1) The Inventor's Supply Kit


Originally made for my nephew, this has been popular on Pinterest this past year. Wanna put one together for someone special? Here's the link.


2) Rupee Crayons


These were party favors for my kiddo's second birthday party, but if you make a mold using the silicone kit I link to, you could make a set for every kid on your gift list. They look awesome, but are really inexpensive and fun. Find the tutorial here.


3) Faucet Handle Coat Rack


If you like upcycling and repurposing (and you have a second-hand building supply store in your area) these make really nice gifts, and they're something you can put together pretty quickly. You can find instructions here.


4) Monster Pillows


Made of scraps of faux fur and felt, these monster pillows are one of my favorite projects to make for a quick birthday or Christmas present. With a single yard of faux fur, you can make four to six 12-inch pillows (depending on the width of the bolt of fabric). Make a few this holiday season using my quick tutorial.


5) Measuring Tape Growth Chart


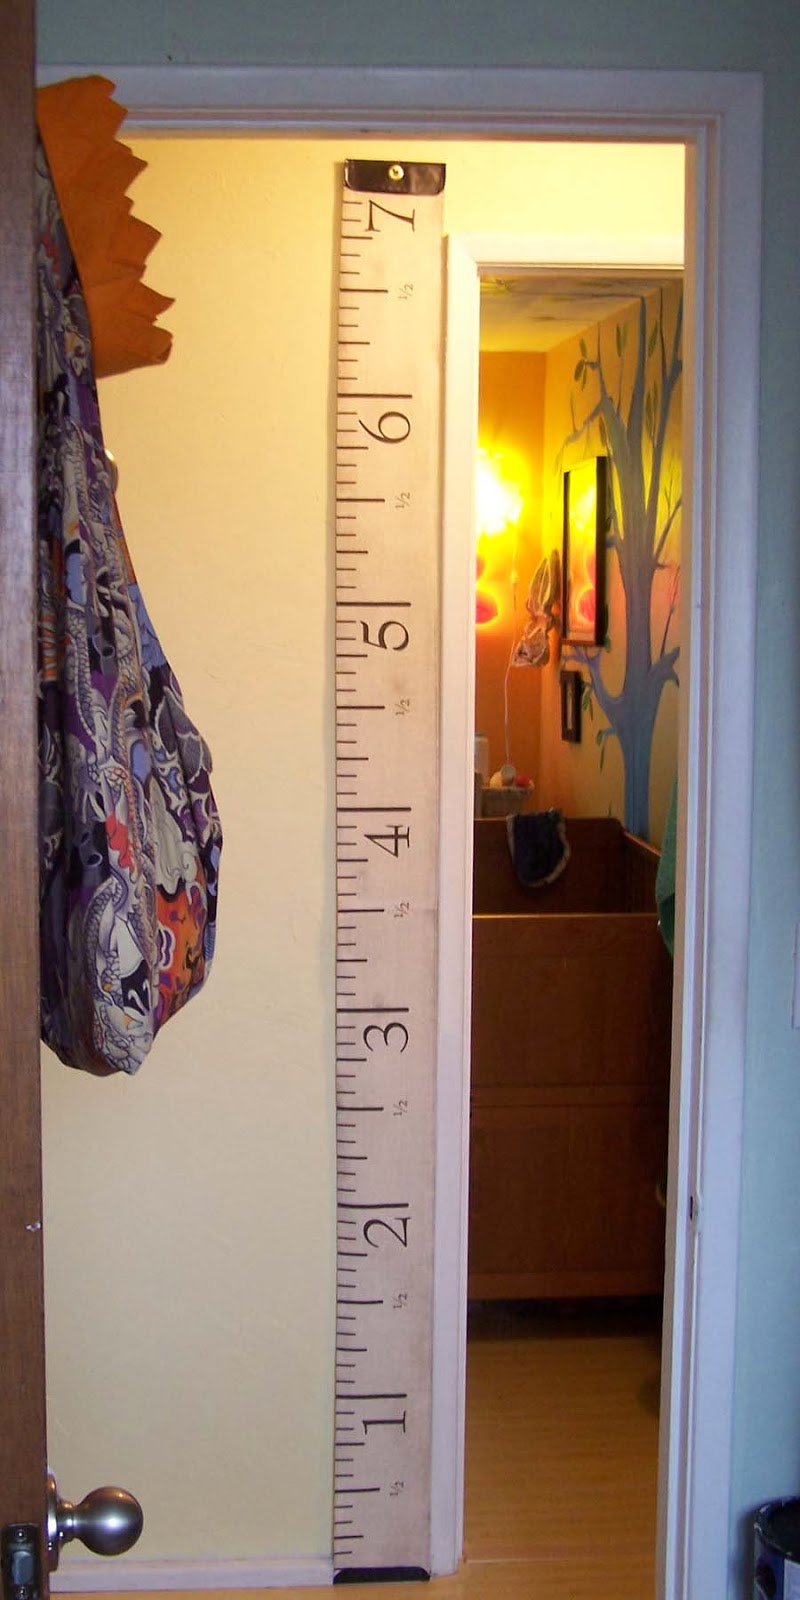
There's still time to order some measuring tape growth chart fabric to put together one of these wall-hangings for someone you love! Spoonflower is about ten days out on orders, but that should still give you a bit of time for assembly if you get your order in soon. (I sell the fabric and finished charts through my Etsy store, too, but my supply is low right now due to holiday orders). Click here for the assembly instructions. Oh, and I have a metric version available, too! (One yard will make 2 1/2 charts, or order single panels directly from me.)


6) Cheap-o Screen Printed T-shirts (or tea towels)


Custom screen printing with mesh fabric, embroidery hoops and latex paint? Yup. Make your own t-shirts this Christmas and knock a bunch of names of of your shopping list.


7) Freezer Paper Printed T-shirts (or tea towels)


This is a great project for one-off prints. In this post, I present a dinosaur t-shirt, and links to other places in my blog where I feature a pretzel shirt, viking t-shirt, and wood-grain flour sack tea towels. Infinitely customizable, without the time investment of making a silkscreen for each design. Find it here.

All right, readers! Go forth and craft like you've never crafted before! Let's do this!

Wednesday, June 19, 2013

heirloom clothespin dolls & a love story


My paternal grandparents were married in the midwest in the early 1940s, as young college graduates. Grandma's dress was  long and made of ivory silk, and her smile glows and her eyes shine from happiness in the photos I've seen of that day. I think most days with my Grandpa, they probably shone just the same.

She was on the shorter side of our family tree, and birdlike in so many ways (I remember her laugh like birdsong, her light hands and their feathery movements). She was small enough that the seamstress overestimated the length of her gown, and several inches had to be trimmed from the hem. Several inches that she, a saver like me (only with more attic space), stashed away through fifty-six years of life after their wedding day, and which Grandpa, unawares, stashed away for an additional fourteen long years after her death.

And so the trimmings of Grandma's silk wedding gown lay undiscovered until, cleaning out some hidey space after Grandpa followed her into the unknown, my dad and his siblings found them again. The pieces must have been labeled, or they might not have recognized what they were. Or possibly Grandma stored the pieces with her dress, and my dad and aunts and uncles knew them on sight. Somehow it came from my dad to me, to split in some way between my sisters and I.

They came as two oddly shaped pieces, maybe five inches at the widest point and tapering, at the ends, to nothing. I imagine the nervous hands of the person making the alterations, wanting to get it just right in one try. This was someone's wedding dress, after all. No room for error.

Though long, the odd shape of the two pieces made it hard to decide how to use them. I sat on the project for another year, cut a piece to try to make a silk flower, and abandoned the project as too ugly to live.

Thrown off by my craft fail, I stashed the silk away for another six months before inspiration struck in the form of clothespin dolls.


Grandma was crafty like me, too. Really, a number of us (aunts, sisters, cousins) share the affliction. For Grandma, it was mostly knit and crochet. An afghan for each grandchild was our birthright, and I remember very clearly a baby blue sweater she once made for me when I was a kindergartner. It was knit in a checkerboard weave pattern. I loved it. I have exactly one photograph of it. This one. (We were camping with some cousins, one of whom is, in this photo, regretting her offer to share her chair with her stocky five-year-old cousin with the bloody knee.)


I have more photos of my Grandma and Grandpa than I have of this sweater, but not many. After marrying, my grandparents moved to Southern California where my Grandpa made a name for himself as an aerospace electrical engineer. Grandma raised five kids and managed a house using her degree in home economics, and she did a good job on every one. One of them (my dad) married and moved north to pursue a career as a a civil engineer. After that,  they saw him (and later, us) only once a year or so. I don't have as many photos or memories of them as my SoCal cousins do, and I didn't get as much time with them while I was growing up, but oh, there was so much love. We felt it from a distance of hundreds of miles. 

I made the dolls first, carrying their bouquets of buttons from Grandma's button box. It came time to cut the silk for their dresses, and my hands weren't sure I meant them to do it. Seventy years that silk sat untouched. Seventy years since it had been cut from the hem of her wedding dress. Back then, the act of cutting this fabric had kept my grandma from tripping on her hem. Now? I was cutting into her dress again. Her wedding dress. There was no room for error.


I kept my cuts as few as possible, sewing six little wedding dresses (two-layer tubes, really, cinched at the waist) from the remnants. I had painted the dolls' hair and eyes to match Grandma's on her wedding day: dark hair, blue eyes; and now, I dressed them one by one. 


One of my step-sisters got married a month ago, and my younger sister will be getting hitched in a couple of weeks. It's all a cycle, you know. This has happened before, and it will happen again. Seventy years from now, some grandchild will be chopping up some memento of one or the other of them to make into something new. Just in time. 

Thanks for reading.

(p.s. you can make these photos larger by clicking on them.)

Linking up to:

Sunday, December 30, 2012

post christmas craft-a-thon, part 1

After Christmas, when everyone's holding their big post-Christmas clearance sales, I like to spend a little gift card cash on some marked-down craft kits for a change-up to the daily finger-painting and coloring we do.

This little spin art kit in a very nicely designed box came from Bed, Bath, & Beyond and cost under $3.


It came with twenty-five circular sheets of paper, three little bottles of paint, and a "spinner", which is essentially a top.


Of course, if you're working with a not-quite-three-year-old, you're gonna burn through the supplied paint in just five art pieces, but I'm okay with that. The kiddo stayed interested for a half hour (shockingly long these days), and thinned-down tempera paint can substitute for the other stuff. Overall, a nice way to spend a bit of our afternoon.


If you pick up (or build) a similar kit, work inside the box as recommended to avoid spattering walls etc. And experiment with different speeds of spin and different amounts of paint; the results can vary wildly.

What post-Christmas craftiness have you and yours been up to? I've got a couple of competition projects and some birthday stuff in the works, which is good; the holiday projects didn't all come together in time, but I'm finishing stuff and feeling good about my progress.

Thanks for reading!

p.s. you can make these photos larger just by clicking on them, but you probably already knew that.


Tuesday, November 27, 2012

coffee sack tree skirt

Hey, here's a project you can make with all those pretty coffee sacks over in my Etsy "supplies" shop (you can also check out a past project here).

A reversible coffee bean sack Christmas tree skirt! It's not too tough, just a little cut and sew.


I started with a vintage sheet with a vaguely woodgrain-ish pattern for the flip side. A twin size will do.


You'll need two standard coffee sacks for this project. When you get them, take out the stitching to make two large panels.


I used a permanent marker tied to a two-foot length of string as a compass to trace semi-circles on each panel. You'll want to zig-zag or serge the edge of each panel.


You'll probably find you're happier if you treat the sheet the same way, cutting two semi-circles instead of one big circle. It's easier to handle the compass when you're not trying for an entire circle, and it leaves you the right amount of seam allowance at the slit.

Cut out the centers and zig-zag the new edge.

After stitching the two burlap halves together on one center seam only, do the same for the backing.


(Please excuse the lack of photographs for this next part; it's exactly like sewing a pillow case.) With right sides together, stitch the burlap and sheeting together around all edges with a 1/4-inch seam allowance, leaving an eight-to-twelve-inch space to turn it all inside out.

Turn it inside out, pin and press flat, and reinforce by stitching all edges.


Depending on the sheet you use for the flip side, you can get really Christmas-y, or leave it more neutral so that BOTH sides can be used with any color scheme.


You could dress this project up with rickrack, ribbon, or trim. I'll leave that to you. This one, I kept simple.


Of course, if you'd rather buy than make this close to Christmas, you can always jump over to my Etsy shop and snap this one up! Or start collecting supplies now; this project is pretty quick (maybe three hours, total) so you totally have time to order your coffee sacks and still get it stitched up weeks before Christmas. Use the code "CAFECHRISTMAS" at checkout to get a 25% discount on all coffee sacks in my supplies shop between now and December 25th.


But enough about me; what are you working on for the holidays? Any big projects you're trying to tackle?

Thanks for reading!


p.s. you can make these photos larger just by clicking on them, but you probably already knew that.


Linking up to:

Visit thecsiproject.com

Petite Hermine