Showing posts with label quick. Show all posts

Monday, August 10, 2015

fast and easy paper making for kids!

If you have a preschool-aged kid (or older) with an interest in recycling, this is a fun afternoon project! Let's make some paper!

Take scrap paper and, with your kid, tear it up and put it in a blender with some hot water. We used a couple of mis-printed sheets from the printer, a bit of cardboard, two pieces of junk mail, and a sheet of purple construction paper. The trick is: the blender blades have to turn freely, so don't jam-pack the blender and use lots of water.

Blend till pulpy.


Kids can pour into the screen! We actually did the pouring over a catch-basin, then moved it to the table.


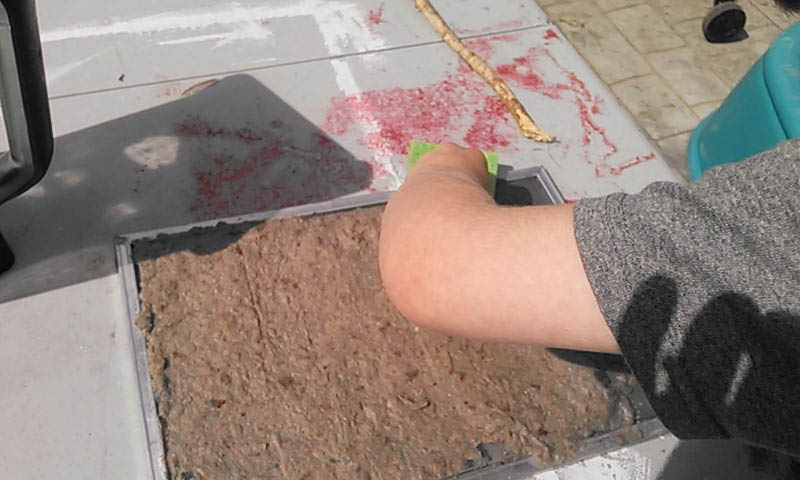
Kids can sponge gently to remove excess water. Here, my now-gigantic, soon-to-be-kindergartener kiddo sponges our screened paper.


Flip it over on felt, polyester, or polypropylene cloth (heck, linen would probably work, too), then press from the back with a sponge (kids can do this part, too!) (The kiddo is developing his photography skills; these are nicely framed, I think.)


Carefully lift screen, helping paper separate by pulling gently on the corner. Once the  entire screen is separated from the paper, leave it to dry.


And once it's dry, you can cut it into two equal pieces . . . or more.

The resulting paper will vary in thickness and texture, depending on your pour, and color, depending on your source materials. Ours feels a little like egg carton cardboard.

Nice textural quality; the screen leaves crosshatch marks on the surface, which look great when rubbed with a crayon.  

And that's all there is to it! The materials used don't have to be expensive. We used a small window screen from the recycled building materials store (99 cents), some kitchen sponges, and a polypropylene sack.  Serviceable and fun for a summer project! 

We're going to try this at the preschool's day camp this month, too, but using hand mixers; the low-tech kind with a hand crank (go go fine motor skills!). I'll try to remember to post the results for those who want to give it a try!

Thanks for stopping by!

-a

Tuesday, April 22, 2014

subway tile baby shower quilt

A friend of ours from the preschool had a baby shower for her second kiddo, a girl, a couple of weeks back, and in celebration I made this quick little subway tile-style baby quilt.


The top is made of vintage textiles I've collected at thrift stores and estate sales (poppies + stripes), stuff from my stash (including a pair of Heather Ross prints and some cute owls), and a couple of my own prints from Spoonflower (the measuring tape and cupcake prints are both mine). The kicker is that I also used a crib sheet from the recipient's registry for some of the blocks as well as the quilt backing, which ties it in nicely to the nursery bedding.


The subway tile pattern is a pretty simple one to replicate. Just cut 48 rectangular blocks (mine are 4 inches x 10 inches) and stitch into rows of four, pressing seams flat when done.

Every other row, cut a 5-inch section off of one end, and attach it to another end. Then sew the rows together to make your quilt top twelve rows high. Press all seams down.


Instead of quilt batting, I used some organic cotton + organic bamboo sweatshirt fleece in between the layers. I had it on hand and it gives the quilt a nice weight and a sturdiness that will help it last a nice long time.

I stacked and pinned the layers just like I did for my sister's wedding quilt, only on a smaller (and quicker) scale. When quilting the layers together, I stitched along both sides of each horizontal seam and called it good, except for the corners. There, I stitched some simple designs: a fish, a bird, a leaf.


I used the quilt binding technique introduced to me by the Smile and Wave blog; it's taken all the mystery out of quilt binding for me, and lets me coordinate binding to my project, which I love. I'll link to it once her site's back up. Updated 6/7/13: Here's the link.


Basically, cut 3-inch strips, sew together at an angle to avoid bulky seams, then press flat. Fold almost in half along the length (favoring one side by about 1/4 inch), press, then fold edges to the center and press again. The wider side goes on the back of your quilt, so that when you run the quilt through your sewing machine the top and bottom are certain to both get caught in the stitches.


After that, the hand finishing is a cinch.


It was a big hit with the mama-to-be, and I was pretty happy with it, too! A couple of people asked if I sell my quilts; I don't at present, but I really like to give them as gifts.

Thanks for reading! If you make your own subway tile quilt, I'd love to see!

Linking up to:
My Repurposed Life

Wednesday, March 26, 2014

removing water stains from a dresser

I have a veneered 1928 dresser with Bakelite drawer pulls that I found at a thrift store a really lot of years ago. We were mostly broke at the time, so it was kind of a big deal. It came with a vanity and a headboard, too (which aren't currently in use); I think I carted it home piece by piece in my car? Or maybe I borrowed a truck? It was a lot of years ago. I was really into Bakelite at the time, so I was pretty excited.

Right before we left on our road trip to Montana a year and a half ago, I tipped over a glass of water that had been on top and it splashed and dripped all down the front. The water stains appeared right away. I mopped up all the water, made sure everything in the drawers was dry and in good shape, and hoped that the water stains might dry out and disappear by the time we returned.


But that's not how water stains work, as it turns out. I've just been staring at my ruined treasure since then, wondering whether it was salvageable or whether it'd have to wait until I could pull it out and completely refinish it.

Good news: while cleaning my room, I finally decided to do a little on-line research to see if there was a safe, non-toxic, simple solution that'd tide me over until refinishing. There is!

Denatured alcohol is recommended; as I don't have any of that, I used standard rubbing alcohol from my first aid box. I just poured a little on a wash cloth, and rubbed it on.

I had stared at those water stains for so long, I really didn't expect them to disappear so quickly, but they did. It worked so quickly that I didn't even take the time to run down the hall for my camera; I just snapped some quick photos with my smart phone. (Sorry about that.)


The alcohol took a little of the finish off, too (totally expected), so I followed up with some thorough drying and some paste wax.


Eventually the whole thing needs to be refinished (the shellac, like the shellac on my piano, is starting to crackle), but in the meantime, I don't have to stare at those accusatory water stains anymore. You might be amazed how much that improves the feeling I have when I walk into the bedroom, unless you've got some water stains of your own that you've been staring at for over a year. You will want to try this on your own.

Thanks for stopping in! 

Sunday, November 24, 2013

just in time for the holidays: 7 diy gift tutorials from my blog


With the holidays coming up, I wanted to put together a quick post for you all featuring links to seven of my most popular DIY gifts! Here they are, in no particular order, so you can spend less time and money at the mall this year, and give gifts that mean a lot to family and friends who mean a lot to you.

1) The Inventor's Supply Kit


Originally made for my nephew, this has been popular on Pinterest this past year. Wanna put one together for someone special? Here's the link.


2) Rupee Crayons


These were party favors for my kiddo's second birthday party, but if you make a mold using the silicone kit I link to, you could make a set for every kid on your gift list. They look awesome, but are really inexpensive and fun. Find the tutorial here.


3) Faucet Handle Coat Rack


If you like upcycling and repurposing (and you have a second-hand building supply store in your area) these make really nice gifts, and they're something you can put together pretty quickly. You can find instructions here.


4) Monster Pillows


Made of scraps of faux fur and felt, these monster pillows are one of my favorite projects to make for a quick birthday or Christmas present. With a single yard of faux fur, you can make four to six 12-inch pillows (depending on the width of the bolt of fabric). Make a few this holiday season using my quick tutorial.


5) Measuring Tape Growth Chart


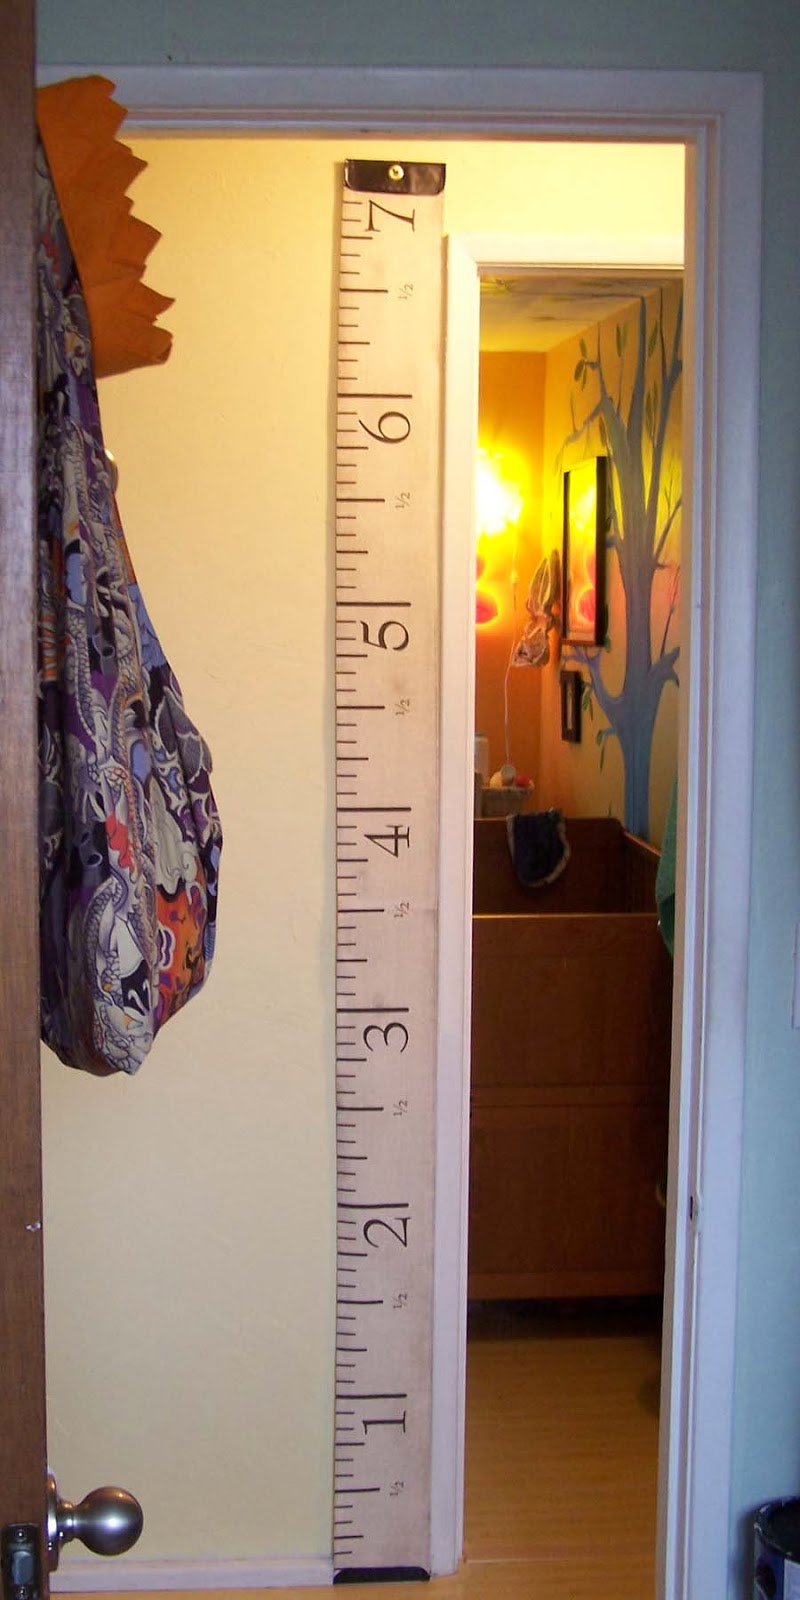
There's still time to order some measuring tape growth chart fabric to put together one of these wall-hangings for someone you love! Spoonflower is about ten days out on orders, but that should still give you a bit of time for assembly if you get your order in soon. (I sell the fabric and finished charts through my Etsy store, too, but my supply is low right now due to holiday orders). Click here for the assembly instructions. Oh, and I have a metric version available, too! (One yard will make 2 1/2 charts, or order single panels directly from me.)


6) Cheap-o Screen Printed T-shirts (or tea towels)


Custom screen printing with mesh fabric, embroidery hoops and latex paint? Yup. Make your own t-shirts this Christmas and knock a bunch of names of of your shopping list.


7) Freezer Paper Printed T-shirts (or tea towels)


This is a great project for one-off prints. In this post, I present a dinosaur t-shirt, and links to other places in my blog where I feature a pretzel shirt, viking t-shirt, and wood-grain flour sack tea towels. Infinitely customizable, without the time investment of making a silkscreen for each design. Find it here.

All right, readers! Go forth and craft like you've never crafted before! Let's do this!

Friday, October 18, 2013

altering adult-sized gloves for kids' halloween costumes


For the gloves for my kiddo's Fix-It Felix costume, I came up with several options.

Felix's gloves are solid tan in color, probably meant to mimic this pair, made of pig skin. I didn't order them because (a) they're too big; (b) locally, I found a pair but they cost $21; and (c) my aunt used to have a pet pig. He was really smart.

I searched for alternatives, and eventually found a pair of plain-colored cotton canvas work gloves at the thrift store for 99 cents. Dyed (with a combo of Dylon's Sunflower and Terra Cotta colors), they came out pretty close to the color I wanted. Still too large, but at least close to the right color.


But then I happened upon a pair of flannel work gloves that were even closer in color, except for the cuff.  They were also softer and more pliable, so I went for it. Note: this photo was taken after the fingers had already been shortened, as explained in the next step.


To shorten the fingers of adult-sized gloves: first turn them inside-out, then try them on the person meant to wear them. Mark where the fingers will end on the new-and-improved version (leaving a little room for the seam allowance) then stitch, cut off the excess fabric, and turn right-side out.

Next, remove the non-matching cuff by pulling out the stitches with a seam ripper.


Zig-zag the raw edge, then give it a very narrow hem.


Finish the glove with a band of 1/4-inch elastic stitched in place about an inch from the new hem.


And you're finished! Below is a photo of the finished gloves on my fully-costumed kiddo, holding Felix's gold hammer. (You can also see a bit of the tool belt, which I'll be talking about in the final Fix-It Felix blog post tomorrow.)


This will work on any gloves made of woven cloth. You may even have good success on gloves made of knit fabric, if you zig-zag the ends of the fingers to prevent them from unraveling. Leather, though, might be trickier, depending on the thickness and stiffness of the leather.

Tomorrow will be the last in this series, featuring the tool belt, pants, and boots, so come on back if you're trying to finish up a Fix-It Felix costume of your own by the time the weekend is over!


Thanks for reading!

Monday, February 11, 2013

delusions of grandeur part 4: cartoon portrait cupcakes

I won't lie: I've been a bit overwhelmed. The past couple of weeks have been an absolute marathon of projects. Not only was I competing in So You Think You're Crafty?, but I've also been making a ton of stuff for my kiddo's birthday and trying to keep up with book covers at work. And so, last night, with the party over and the party mess carted from the community center back to our living room and kitchen, I went to bed at 10:30 pm for the first time in months.

But let's back up for a minute:

First, I was eliminated from the competition last week, with my upcycled Sunburst Mirror project. Now, I don't really feel like my project deserved to do as poorly as it did, but admittedly, I was ready for competition to be over (so I could focus on birthday stuff). So when the other competitors ratcheted up their voter drives on the last day (don't ask me how), I maintained radio silence and decided to let the chips fall where they may. And fall they did.

And so I worked on robot decorations and cakes and giant crepe paper chandeliers and . . . well, let's just say there are a ton of party posts in our future, readers.

Now, my kiddo's party was all about robots, but he also has a thing for cake lately. He can't get enough of the duck cupcakes on the cover of What's New, Cupcake, for example. So we had to make a batch of cupcakes for our monthly play group last week.

After carefully studying all of the cupcakes in Hello, Cupcake, my kiddo kept coming back to the funny face cupcakes. When I asked if he wanted our cakes to look like him, I got an emphatic, "Yes!"


We used the recipe in the book to doctor a cake mix using buttermilk and eggs, then tinted cream cheese frosting and used a mix of candies for the faces (he picked green shoelace candy for the mouths).


Finally, to cartoon-ify his crazy hair, I filled a Ziploc bag with a mixture of white chocolate and butterscotch chips + two drops of yellow food coloring and melted them together. Then I snipped a corner and squirted out some wild hair squiggles onto some parchment paper. When they'd hardened, I cut slits into the cake and poked in the hair.


Ta-da! Pretty quick and easy. And he was one happy kid, looking at all those little cartoony hims.

Anyway, I like to do a little warm-up cake project before doing a big all-day cake (like last year, when I made the rainbow cupcakes before the Zelda cake) and these guys fit the bill. I'll be posting the robot cake soon . . . it was a little more time-consuming than these cuppies, but you might like it anyway. :)

Thanks for reading!


p.s. you can make these photos larger by clicking on them, but you probably already knew that! clever you.


Tuesday, May 15, 2012

a celebration, a lesson, a giveaway!

**Scroll down to the bottom of this post for Red Fox pillow giveaway!


Welcome! Last week, this blog officially hit 10,000 page views, which is a pretty big milestone for me. For the first couple of years of this blog, I didn't blog with any sort of intention of having a whole lot of folks see it, and I didn't blog about every project I did. And I didn't blog very regularly. There was an especially noticeable lack of posts in 2010, after my son was born (who knew newborns could take so much energy? aside from every mother in the world, I mean).

Since finally giving up my regular gig designing book covers at the start of this year, though, I've made a commitment to be more intentional and frequent in my postings, and to try to start increasing readership. Turns out that I really thrive on sharing my creative work with others. So going from a couple thousand page views to ten thousand in the space of a few months has been very encouraging. Thank you! And this week, I'm actually on the precipice of 11,000 views. Incredible. (update: hit 12,000 tonight, 5/24.)

I know this will seem like small potatoes to some bloggers who regularly get thousands of hits per blog entry, but it's a place to start!

I'm also celebrating the release of my Quick Red Fox collection of fabrics over at Spoonflower.


This is a design set that's very close to my heart, as it is the first collection I've done since last year's Baby's Day at the Beach, and also the first since then to have been hand drawn and watercolored.


Doing artwork with my hands (and then manipulating it on the computer) is much more rewarding for me than doing all of my work on the computer. Although I'm designing both, I feel more ownership over the designs including handwork. I've always felt that way when designing book covers, too; the ones with handmade elements always felt more mine.

Of course, as with any design on Spoonflower, designs must be proofed before being sold to the public. Designers can order a single 8x8 sample of a single design ($5), or they can add all their designs to a collection, and order a collection sampler ($20 for up to 15 designs, $30 for 16-30). I always try to wait until I have enough to get a full fifteen designs before ordering, so I feel like I'm being as cost-effective as possible.

Here's a photo of my most recent collection, The Quick Red Fox, on a sampler sheet with four colors of my new Snow White print, my White Swans in a Blue Pool, and a couple of recent contest entries I hadn't had proofed yet (the vintage sewing pattern and the library check-out cards).


And here's the lesson: it might seem like a drag, and it might seem like too long to wait, but it's so important to proof your Spoonflower designs.

For example, there are three patterns in my Quick Red Fox collection that need to be reworked because, well, the color variations didn't have enough differentiation to show up well when printed. These are the three designs that included a neutral tone-on-tone chevron pattern in the background. The colors looked great on screen, but turned out too close to each other to perform well on printed fabric. You'll notice a couple of squares in the photo above that look blank. These are the ones with a nearly-invisible chevron pattern. So I'll make adjustments to beef up the pattern and upload revisions that fix the issues, and in the end, everyone will be happier for it.

That's the reason Spoonflower requires proofing before letting you sell to the public. Otherwise, there'd be a bunch of disappointed customers asking for refunds for bad fabric, and their reputation would suck.

Currently, five of the Quick Red Fox patterns are up for sale here, on my Spoonflower page. But, in celebration of the line going on sale, and in celebration of 11,000 page views (which I'm sure to hit by the end of the day), I'm hosting my first giveaway!


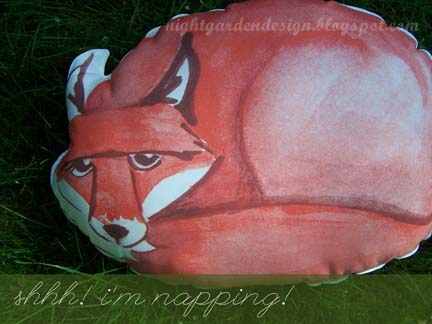
One lucky winner will win a fox pillow of his/her choice (Sneaky Red Fox or Sleepy Red Fox), sewn from my Red Fox Pillow Set fabric.

A second winner will win both mini pillows from the set (Cold Shoulder Fox and Fox Face).


How to enter the giveaway: Comment on this blog post (or any other blog post on the Night Garden Design Blog) about a project or post you especially like by May 25th.

If you post anonymously, add your name to your comment so I can add you to the drawing.

You can enter more than once by leaving comments on more than one blog post. I'll see them all, as my comment settings are set up to run everything by me first.

I'll also count new blog follows as entries, so copy my url into your reader!

On May 27th, I'll put all the names in a hat and let Baby P pick the winning entries at random.


Winners will be announced here on the blog, Flickr, Facebook, Twitter, and on the Spoonflower page for the Fox Pillow Set on May 27th, and the packages will be shipped out by June 1st (assuming I've heard from the winners by then). If you provide a way to contact you, I'll do that, too!


And yes, I'll even ship internationally.

Thanks for reading, everybody, and good luck to you!

UPDATED TO ADD WINNERS: Fox pillow of your choice (Sleepy Fox or Sneaky Fox): "I really like the sneaky fox! Your style is so unique, and creative!" --Jessica

Two mini pillows (Cold Shoulder Fox and Fox Face): "My son would LOVE these foxes! I envy your drawing skills and will add you to my Google Reader blogroll." --Holly U

Here's a new twist: Holly U can choose to instead to have the second large fox pillow (whichever one isn't chosen by Jessica), in which case, I'd pick a third winner for the two mini pillows.


Contact me by 5/31 at info at thenightgarden.com with your address and preferences! If I don't hear from you by the 1st of June, I'll pick a new winner.


Linking up to:


Tip Junkie handmade projects

Photobucket


mop it up mondays