Showing posts with label stencil. Show all posts

Sunday, November 24, 2013

just in time for the holidays: 7 diy gift tutorials from my blog


With the holidays coming up, I wanted to put together a quick post for you all featuring links to seven of my most popular DIY gifts! Here they are, in no particular order, so you can spend less time and money at the mall this year, and give gifts that mean a lot to family and friends who mean a lot to you.

1) The Inventor's Supply Kit


Originally made for my nephew, this has been popular on Pinterest this past year. Wanna put one together for someone special? Here's the link.


2) Rupee Crayons


These were party favors for my kiddo's second birthday party, but if you make a mold using the silicone kit I link to, you could make a set for every kid on your gift list. They look awesome, but are really inexpensive and fun. Find the tutorial here.


3) Faucet Handle Coat Rack


If you like upcycling and repurposing (and you have a second-hand building supply store in your area) these make really nice gifts, and they're something you can put together pretty quickly. You can find instructions here.


4) Monster Pillows


Made of scraps of faux fur and felt, these monster pillows are one of my favorite projects to make for a quick birthday or Christmas present. With a single yard of faux fur, you can make four to six 12-inch pillows (depending on the width of the bolt of fabric). Make a few this holiday season using my quick tutorial.


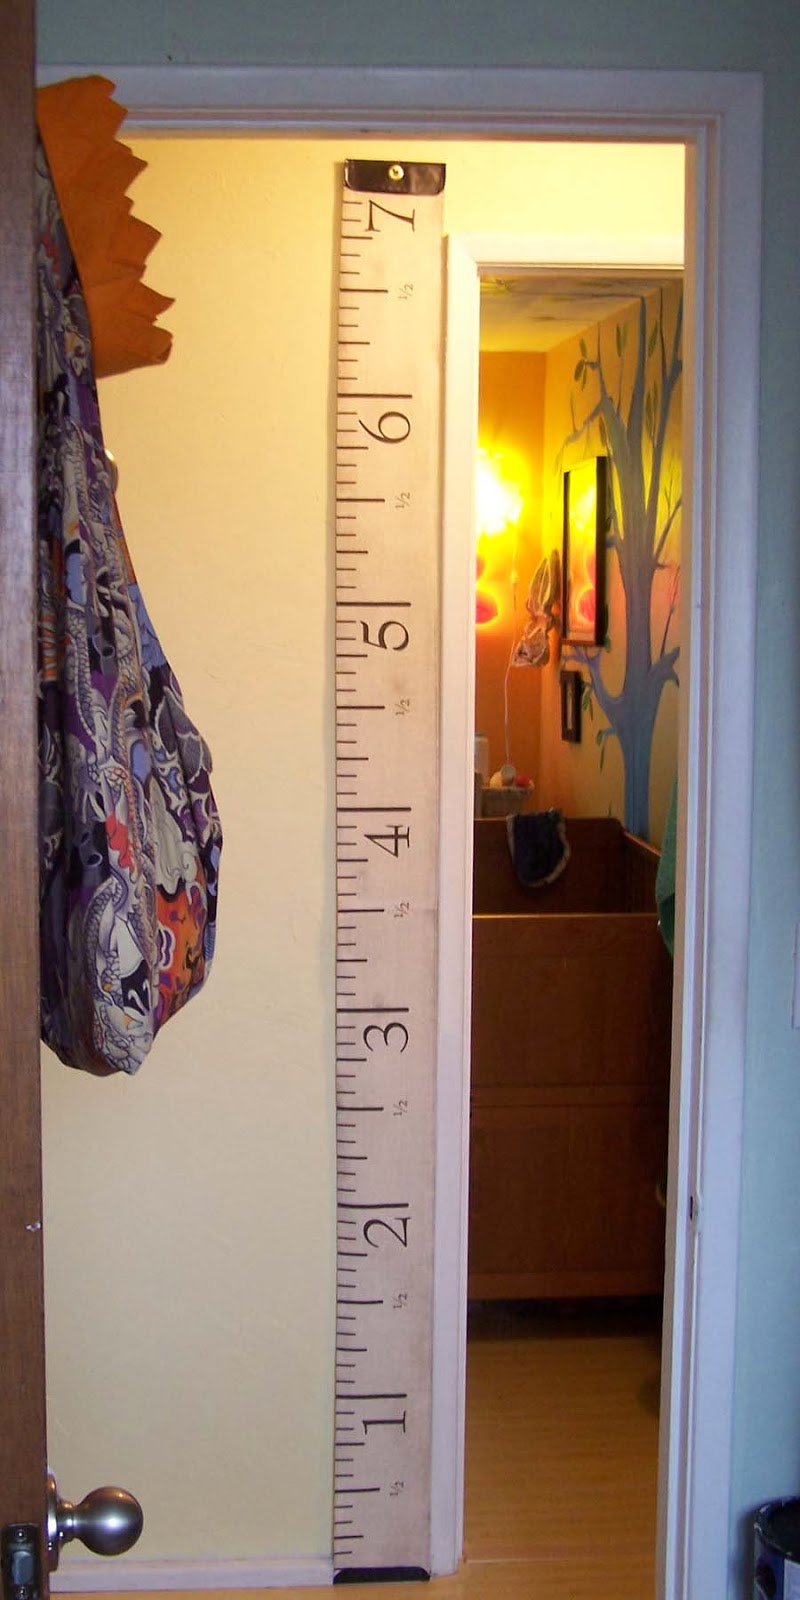
5) Measuring Tape Growth Chart


There's still time to order some measuring tape growth chart fabric to put together one of these wall-hangings for someone you love! Spoonflower is about ten days out on orders, but that should still give you a bit of time for assembly if you get your order in soon. (I sell the fabric and finished charts through my Etsy store, too, but my supply is low right now due to holiday orders). Click here for the assembly instructions. Oh, and I have a metric version available, too! (One yard will make 2 1/2 charts, or order single panels directly from me.)


6) Cheap-o Screen Printed T-shirts (or tea towels)


Custom screen printing with mesh fabric, embroidery hoops and latex paint? Yup. Make your own t-shirts this Christmas and knock a bunch of names of of your shopping list.


7) Freezer Paper Printed T-shirts (or tea towels)


This is a great project for one-off prints. In this post, I present a dinosaur t-shirt, and links to other places in my blog where I feature a pretzel shirt, viking t-shirt, and wood-grain flour sack tea towels. Infinitely customizable, without the time investment of making a silkscreen for each design. Find it here.

All right, readers! Go forth and craft like you've never crafted before! Let's do this!

Thursday, October 10, 2013

c is for chasmosaurus

After last week's craft fail, it was nice to have a couple of craft successes. This is one!


This chasmosaurus shirt is part of our gift for an upcoming birthday party this weekend (second part to be featured here, soon!). Our little friend is a big-time dinosaur enthusiast.


Those of you without a Silhouette cutter will be happy to know that this was made without one. I used freezer paper and an X-Acto blade, after first designing the image in Adobe Illustrator. Free dinosaur graphics are everywhere on the internet, though, so it's possible to do this project with other dinosaurs, without Illustrator. Chasmosaurus fans can use this design for your own personal projects (not for sale!).

You can print directly on the freezer paper. Cut it to fit your printer and make sure you'll be printing on the textured "paper" side, not the slick plastic side.

To save ink, I turned the opacity down to 30% so that it would print a light gray instead of black. You could also just print the image in outline, but I like to have a filled-in figure for whatever reason.


After it's printed, cut it out with an extra-sharp X-acto blade on a self-healing mat or a surface you don't care too much about (like an old magazine or a drawing board). The sharpness of the blade is especially important for those tiny letters.

Then iron it on your shirt and paint using a short-bristled brush! As I've mentioned before, the beauty here is that kids can help with the painting part. My kiddo helped paint this for his friend, so the gift is really from his own two hands.


Here are some of my previous freezer paper stencil projects, in case you'd like some more ideas or a bit more step-by-step.

(1) flour sack towels
(2) viking t-shirt
(3) toddler art pretzel shirt

Thanks for reading!

p.s. you can make these images larger just by clicking on them . . . but you probably already knew that, clever you.

Tuesday, August 27, 2013

quick updates: stenciled adirondack chairs

Awhile back, I saw a quick stencil idea in HGTV Magazine (I think). It happened to coincide with me discovering a vintage set of number and letter stencils at Bring.


I thought about it awhile, then went ahead and bought the stencils and completed the project in about ten minutes. Maybe less, as I already had the paint out for another project.


Six chairs, six numbers.


I used a regular bristled paintbrush; the numbers I stenciled with a mostly dry brush turned out better, with less paint piling at the edges.


I used leftover recycled indoor/outdoor primer from Metro Paint, the same stuff we used on our house a year ago (still going strong!).


It didn't take the Mr. long to notice really. We had people over that weekend and about halfway through the evening he asked, "Hey, when did you paint the numbers on the chairs?" It had only been a couple of days. 

And there you have it! A really quick update to personalize your yard furniture.

Thanks for reading!


Linking up to:


Saturday, April 13, 2013

freezer paper stencil toddler art pretzel t-shirt

My kiddo is less familiar with the 1960s than with pretzels, so it wasn't really too surprising when he pronounced the glittery, neon pink "peace sign" shirt a "pretzel shirt" and said he wanted to wear one. I thought something like that might make a nice project for one of the blank t-shirts we've picked up recently, so we headed home to make our own pretzel shirt.


Really, though, this would make a nice project for whatever image your kid wants. And the best part is that it's a great project for even little kids to help with, which means you're not trying to work on it by yourself while your kiddo is pulling at your sleeves.

You can take a peek at one of my previous freezer paper stencil projects (1 and 2) for the basics if you're not familiar with the freezer paper stencil process. Basically, cut a stencil from freezer paper and iron it on. For this project, we also used Crayola's fabric markers (previous freezer paper stencil projects here used acrylic paints and Tee Juice pens).


Because I planned on the kiddo doing most of the coloring, I covered as much of the t-shirt as possible with freezer paper to prevent color from ending up in unintended places. You'll also want to put a piece of cardboard inside the shirt to keep color from seeping through to the back if (like me) you have an enthusiastic marker-wielder.


I let the kiddo pick the colors and tried to encourage him to make sure a lot of color made it onto the shirt rather than the paper . . . but yeah, that's pretty much a losing battle, so I surrendered early.  After removing the stencil and heat-setting the design, we were done.


And here it is, finished! We were both pretty happy with the way it came out, although I think if I were to repeat this project, I'd outline the shape completely first so that any areas with lighter coverage wouldn't blend into the background quite so much. But I think that even without that step, this was a nice collaborative project. He got to color on a shirt, and I got to help make sure it looks like a pretzel.


Thanks for reading! What projects have you been doing with your toddlers lately? We're always looking for fun projects that keep well (read: don't have to be tossed out after a week).

p.s. you can make these photos larger by clicking on them; but you already knew that, clever you.

Crayola Fabric Marker, Assorted (Google Affiliate Ad)

Saturday, January 5, 2013

freezer paper stencil viking shirt

I had a falling out with the owner of a local shop recently. I'd gone there to buy a specific t-shirt for my kiddo, one with a cuuuute viking pattern screen printed on it by a company I like, but can't always buy (because good sense dictates I can't spend $30 on a toddler t-shirt on a regular basis).

But I left without it.

It's all too bad because I like to support local business when I can (even if it means waiting for a sale) and I especially like to support mama-owned businesses. More than that, I like to support good graphic designers, and this particular clothing manufacturer hires great ones.

In the end, though, the idea of stenciling a viking design onto a t-shirt isn't copyrighted. In fact, this tutorial that Cheri wrote over a year ago could have inspired the (more recent) designer t-shirt, for all I know. I know it inspired me!


Freezer paper stenciling is something I've posted about before, but this viking design is a whole lot less complex. As you can see, I made it in two different sizes, one for the mister and one for the kiddo.


I also (word to the wise) accidentally cut it into wax paper the first go-around (which DOES NOT WORK) and had to re-do it, so it's a good thing it's so straight-forward.


Cheri mentions in her tutorial that you can find some free-use images on-line and cut them with your Silhouette cutter; you'll be happy to know you can also free-hand the drawing and cut it out with a craft knife if, like me, you're artsy and don't own a Silhouette.


Cut on FREEZER paper, iron onto t-shirt (plastic side down), paint, and let dry.


If your beard is too close to the color of your shirt, lighten it up, dry again, and remove the wax paper.


Heat set, and you're ready to go!


I used a Gap t-shirt from the Goodwill for this design, so the project was really inexpensive and fast. And we like it! I hope you'll link to your freezer paper stencil projects in the comments section below, if you have the urge!


Happy New Year, and thanks for reading!


Sunday, December 2, 2012

freezer paper stencils + flour sack towels

The night before my sweet cousin's wedding, I had a major 11th-hour craft fail in my family's hotel room. My screen printing project fell all to pieces.

Returning home after the wedding, I dusted off my butt and set aside the silkscreen for awhile, turning instead to freezer paper stencils to make my cousin and her fiance' a set of personalized, woodsy kitchen towels.

Supplies: freezer paper, craft knife, brown Tee Juice dauber, + iron. And, not pictured, cotton tea towels and pencil.


Sketch your design onto the dull, unplasticized surface of the freezer paper, then cut it out with your craft knife. I chose to print one of the towels with a woodgrain pattern and a "carved" heart with their initials inside. I drew this freehand, but if you're not sure where to start, you can find images on-line to inspire your pencil.


A more involved design like mine will require careful handling and ironing.


Iron the stencil on to towels carefully, adding separated elements (like the letters in the "carved heart") after everything else.


Using the Tee Juice dauber, go over the entire design.


After letting it dry for awhile, remove the freezer paper and iron the entire piece to set the dye. Wash and dry, then iron flat.


The second design was the same process but a different graphic: a stand of trees, their state, and their initials.


Thanks so much for reading! Wanna make the photos larger? Just click!

Linking up to:

Six Sisters

Be Different, Act Normal

Tuesday, March 13, 2012

stenciled key nook make-over

Time for another Pinterest-inspired project! This one is a quick little project I got moving on thanks to a little boot in the rear from the winter edition of The Pinterest Challenge. Scroll to the bottom of this post for links to the Challenge sponsors. If you happen to be here visiting from one of the sponsor blogs, welcome! Pull up a chair!

This time, I was looking for a stenciling idea for my little hallway key nook which used to be a phone nook, back in the day.

I found several neat stencil projects, but this one:


from A Sense of Design, is the one I decided to go with. Simple to replicate with household materials, elegant, and easily adaptable to a small space.

I scoured her blog for the reference image, but came up empty-handed, so I'm not really sure if it's original to A Sense of Design, or if there's a tutorial to go with it, or anything really, so I apologize if the pin is originally from a different source.

Without further adieu, here's a little before and after for y'all.

From non-descript little door-less cupboard . . .


to bright, cute little niche to hold keys, spare change, and cell phones.


A quatrefoil is a pretty easy little design to turn into a stencil. You can probably figure it out just by looking at this photo, but I'll drop a little tutorial on you after the image.


To make the stencils, cut out three identical squares. Leave one whole, and cut the other two in half. Round each of the four halves into an identical semi-circle, then attach to the whole square. Voila! Quatrefoil! Trace onto cardstock, then trace out about a half-inch border around it, and cut along that line. I eyeballed that part, but you could get fancy with rulers or a seam tracer.

Two coats of zero VOC primer. I used Dutch Boy Zero VOC Multiple Purpose Interior Primer/Sealer.


Start laying in the background color. I have been using two Dutch Boy colors (Gilded Shores and Honey Bear) on my living room and hallway walls. The background color in the cupboard is the darker of the two, Gilded Shores. The color is actually mixed in a paint called Acro Pure by Miller paint.


And here's the full base color with some very light stenciled pencil marks over the top.


This is a close-up of the pencil marks, since you really can't see them in that last photo.


And then I hand-painted inside the pencil lines, using a small paintbrush and Honey Bear.


You could do this differently. You could cut a large, multi-quatrefoil stencil and paint directly on the wall with the darker paint on top of the lighter paint (here's an instructional on that method on the Creative Chaos blog). I would recommend using waterproof stencil paper if you're going to try this method (I think she uses a commercial stencil in that tutorial). For me, working with such a small area, the time it would take to cut the stencil was more than doing it the other way.


And here it is, outfitted with the key rack (photo is courtesy my sister), some pieces from my wood type collection, and the copper piggy bank from my babyhood.


The key rack is attached using Command adhesive picture-hanging strips to minimize damage to the walls. But since I had those on hand, as well as all the other materials, this nifty make-over didn't count against our budget.

What do you think?


(p.s. you can make these photos bigger by clicking on them . . . but you probably knew that!)

Linking up to:

Young House Love, Bower Power, The Great Indoors, and Hi Sugarplum, who are all co-sponsoring the winter Pinterest Challenge! (I'm borrowing their graphic:)


Visit thecsiproject.com