Showing posts with label birthday. Show all posts
Friday, February 20, 2015
packaged airplane crayon party favors
Monday, June 23, 2014
straw rockets!! (quick + easy, and so much fun)
You'll have to excuse me. I write maybe two posts a week, but I work on an average of three or four projects in that amount of time. Often more. Sometimes, projects like these straw rockets from February (February, for Pete's sake) get lost in the fray. It's a bit sad; there's a lot of good stuff in that stack of bypassed blog entries.
These are fun for birthdays any time of year (as party favors or as an activity), for Independence Day, or just because it's summer! If you keep back from trees (so none of the rockets get lost in the branches), they're super impressive at the park. Whose rocket can go the highest? Whose can go the furthest? Who can hit a target?
Materials needed:
• large diameter bubble tea or milkshake straws (you can make two rockets from each straw)
• smaller diameter milkshake straws or regular drink straws that can fit inside the larger straws (one per person, labeled with a piece of tape)
• staples + stapler
• washi tape
• scissors
To make:
The smaller straws (not pictured) are the "launchers". Each child will need his or her own, because the rockets are fired by blowing into the thinner straws. Label each with washi tape and a permanent pen to make sure you're not spreading germs.
Each larger straw will make two rockets. Cut one in half. If your straws have a sharp point, cut that off too, so no one gets injured.
Staple one end shut. (The launcher will fit into the other end.)
Use washi tape to make tips and fins, as shown. Trim into the right shape with scissors.
Repeat for each of your other stapled straw halves, until you have a nice assortment of rockets.
To fire:
Insert launch straw into open base of rocket.
Aim at target or up into the sky, and blow! Depending on the amount of force, these can blip up just a bit, or shoot ten feet in the air; it's all in how fast air moves through the launcher.
And there you have it: one perfectly good (no dust at all, I promise) project I meant to post four months ago. Have a good launch!
Linking up to:
Lou Lou Girls
I Should Be Mopping the Floor
Thursday, February 6, 2014
paper airplane party invitations
Printed on vintage accounting ledger paper.
Airmail graphics for label and stamp are from The Graphics Fairy, and were printed separately on label paper and attached to the airplanes like stamps. ("6 cents" was changed to "4 cents" in Photoshop.)
Postmark is a combination of several glyphs from a font called Dead Letter Office available free from daFont, altered in Photoshop.
Text typeset in Helvetica (all caps, outlined) and Trixie.
I had brainstormed ideas for invitations for my kiddo's Flying Machines party and came up with the idea of a paper airplane invitation that looked like Air Mail. A quick search revealed that it's not a unique idea. Boo hiss. I used this design from Country Living Magazine as a template for my planes, although the result is pretty different.
If you like these but don't want to invest the time to create your own, please e-mail me. I can create a version with your child's name and party details for a reasonable rate, with a 3-day turn-around.
Thanks for reading!
Wednesday, January 29, 2014
candy airplane party favors
A big "thank you!" to the blog Sewing Mama Raeanna for inspiring this fast and easy party favor.
Supplies list:
• Wint-o-green Lifesavers
• rubberbands
• Smarties
• sticks of gum wrapped with scrapbook paper and washi tape (for decoration + sturdiness)
Thread a rubberband through two Lifesavers. If your rubberbands are tiny, you can link two or more together.
Insert a stick of gum through the looped ends sticking out of the Lifesavers.
Insert a roll of Smarties into the space between the gum (wings) and the Lifesavers (wheels). The rubber band will hold everything in place.
Repeat as necessary!
More Flying Machines Party projects:
Tuesday, January 21, 2014
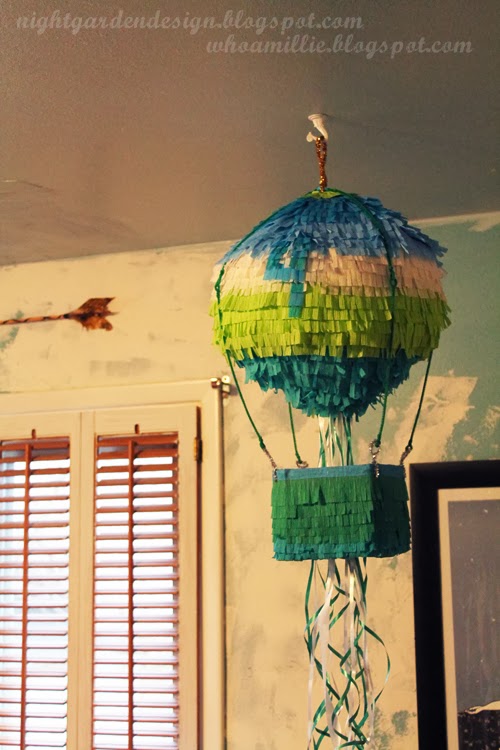
hot air balloon pull-string piƱata
We're actually having two piƱatas this year for the kiddo's birthday; this one, a hot air balloon, is for his Flying Machines Party with his friends; the other, a motorcycle (saving that for a future post) is something he fell in love with at the grocery store. And because I'm a sucker, I said I'd make him one for his family party as well.
But let's talk about that hot air balloon, hmmm?
Round paper machƩ isn't hard to make, really. Just blow up a balloon and coat with layers of paper and paste et voila! After a few days of drying time to make sure your piƱata doesn't mold, you have a blank canvas.
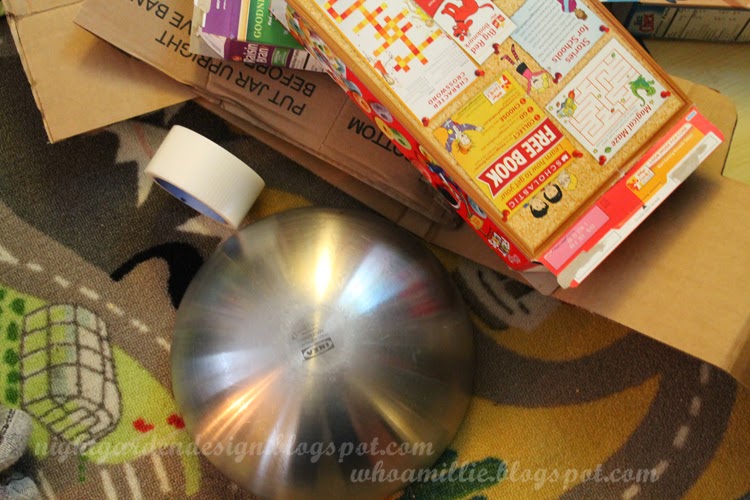
But I've had a thing for simple, dry piƱatas the past couple of years, with pull-strings to boot. I started this one with some cardboard boxes, a round metal bowl, a Make-Do cardboard connector, and some duct tape.
After making a strip of sturdy corrugated board for the bottom rim, I cut long petal shapes out of thin, pliable cereal boxes. These are taped to the rim at the bottom . . .
. . . and have holes poked in the top to fit the cardboard connector.
Here's a view of the inside, which on its own makes a pretty cool design.
I made two, one top and one bottom, then attached at the center with more transparent duct tape.
The Make-Do cardboard connector will support the pipe cleaner hanger coming up.
I used thrift store streamers cut into fringe to decorate (this is actually their third life; last year these streamers were streamer chandeliers at the kiddo's robot party). Glue sticks work really well for attaching the strips quickly and cleanly, but regular white craft glue has a good sturdiness factor.
It's good, I think, to have a shot of how the top is finished off. I just loosened the connector a bit and slipped in some strips of un-fringed crepe, attached with glue. Then I tightened the connector back up for a nice, clean finish.
The basket of the hot air balloon is a four-sided box (no top, no bottom) covered inside and out with more streamers.
To get a number or other design, I work with 3/4-inch sections of streamer, cut into two fringes. I just slip them up under the existing rows of fringe and glue in place, then trim to match row length.
A gold pipe cleaner runs through the piƱata, through the two holes in the connector (essentially wiring everything together), then wraps around the exposed end and forming a hanging loop.
The basket is also held in place by pipe cleaners. Silver ones poke through holes in the cardboard and make hook eyes on each of the four corners. Two long green pipe cleaners twist together end to end to attach the pieces, looping through the silver hook eyes and around the connector at the top.
And here it is all finished in one night! One long night, yes, with all that crepe paper work, but still less drying time than a paper machƩ ball.
We can't wait for all the kids to bust out the treats when the birthday party arrives!
Saturday, November 30, 2013
ducks' pond birthday cake
I started out with plans to make a bottle cap cake, but the kiddo started looking at the cake books and really wanted his dad's birthday cake to have ducks on it.
But sometime soon I'm going to try again to make the bottle cap cake I'd planned on. Unless my kiddo's agenda sounds more fun.
Are you working on any non-conventional food lately? Anybody else have kids who like to play art director?
Thanks for reading!
These were made using the directions in What's New Cupcake? by Alan Richardson and Karen Tack. We used marshmallows instead of donut holes for the heads and mini chocolate chips for the eyes, but otherwise the ducks are pretty close to their predecessors. We chose the "melted frosting" approach to coating the ducks, which was a success.
The pond is colored buttercream through a star tip, and I used chocolate rocks and confetti sprinkles around the edge of the platter for the shore.
And yes, it looks more appropriate for a baby shower than a grown man, but the Mr. was a good sport about our kiddo's decision to add some ducks into his birthday celebration.
But sometime soon I'm going to try again to make the bottle cap cake I'd planned on. Unless my kiddo's agenda sounds more fun.
Are you working on any non-conventional food lately? Anybody else have kids who like to play art director?
Thanks for reading!
Sunday, November 24, 2013
just in time for the holidays: 7 diy gift tutorials from my blog
With the holidays coming up, I wanted to put together a quick post for you all featuring links to seven of my most popular DIY gifts! Here they are, in no particular order, so you can spend less time and money at the mall this year, and give gifts that mean a lot to family and friends who mean a lot to you.
1) The Inventor's Supply Kit
Originally made for my nephew, this has been popular on Pinterest this past year. Wanna put one together for someone special? Here's the link.
2) Rupee Crayons
These were party favors for my kiddo's second birthday party, but if you make a mold using the silicone kit I link to, you could make a set for every kid on your gift list. They look awesome, but are really inexpensive and fun. Find the tutorial here.
3) Faucet Handle Coat Rack
If you like upcycling and repurposing (and you have a second-hand building supply store in your area) these make really nice gifts, and they're something you can put together pretty quickly. You can find instructions here.
4) Monster Pillows
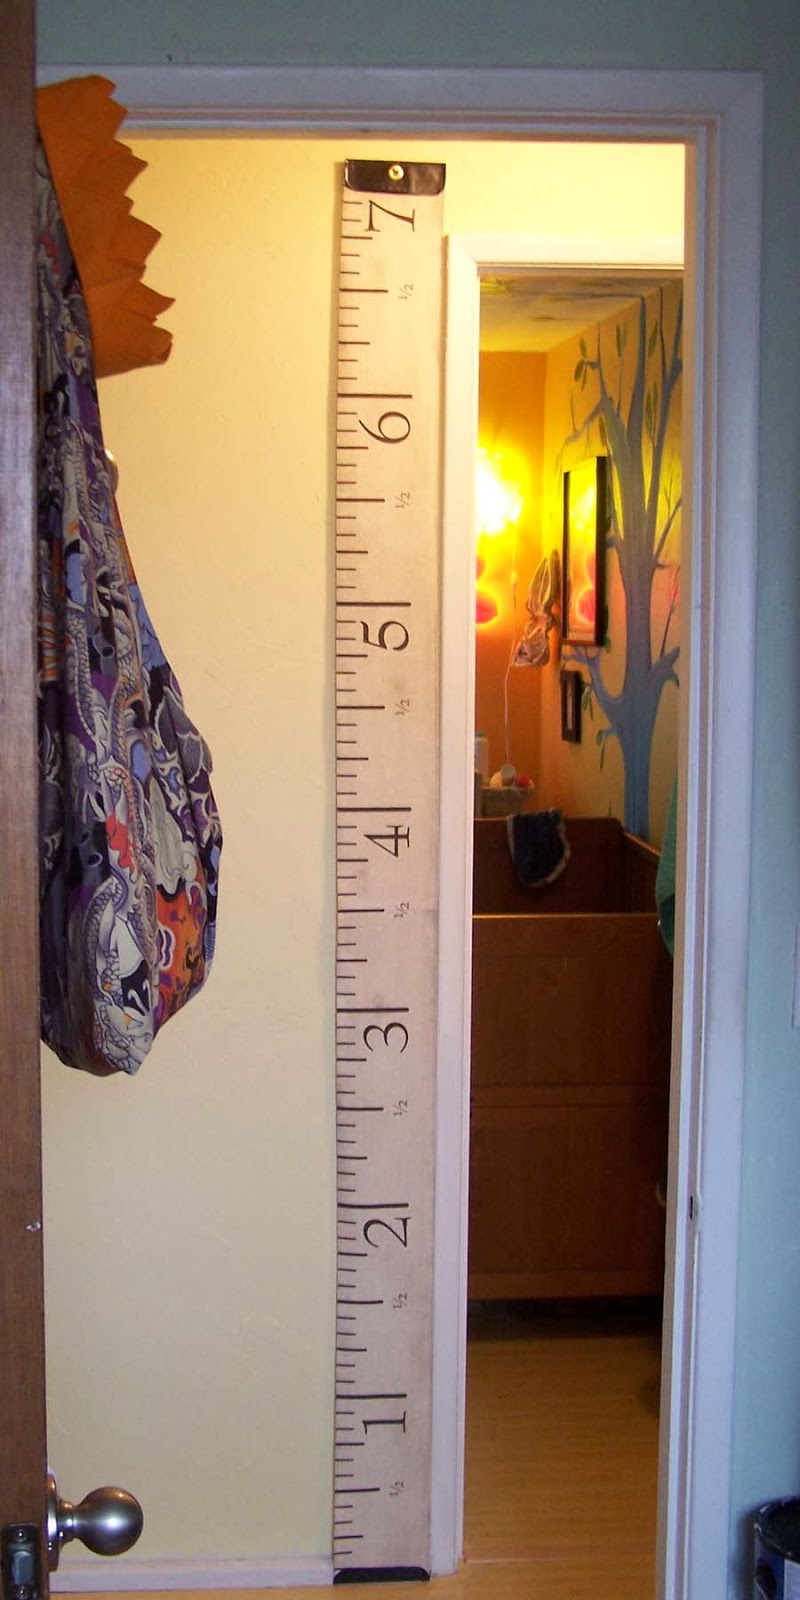
5) Measuring Tape Growth Chart
There's still time to order some measuring tape growth chart fabric to put together one of these wall-hangings for someone you love! Spoonflower is about ten days out on orders, but that should still give you a bit of time for assembly if you get your order in soon. (I sell the fabric and finished charts through my Etsy store, too, but my supply is low right now due to holiday orders). Click here for the assembly instructions. Oh, and I have a metric version available, too! (One yard will make 2 1/2 charts, or order single panels directly from me.)
6) Cheap-o Screen Printed T-shirts (or tea towels)
Custom screen printing with mesh fabric, embroidery hoops and latex paint? Yup. Make your own t-shirts this Christmas and knock a bunch of names of of your shopping list.
7) Freezer Paper Printed T-shirts (or tea towels)
All right, readers! Go forth and craft like you've never crafted before! Let's do this!
Subscribe to:
Posts (Atom)