Showing posts with label furniture. Show all posts

Tuesday, May 27, 2014

thrift store finds: may 2014

Bring isn't exactly a thrift store, but a reuse store that features mainly building materials. But they do have a large furniture warehouse at the back and a gallery space at the front that sometimes hosts a collection of harder-to-find items or art shows of stuff made with recycled materials. Today's post features things we spied at the store earlier this month while hardware shopping for a project.

Here's a wallpaper cutter from the late 19th century.


 A gigantic Low-Voltage Circuit Tester.


An antique trunk and an accordion my kiddo was pretty set on. (I think he's convinced he could school his music teacher if only he was allowed to touch the accordion.)


Another antique trunk. This one was priced rather high, even during the 50% off furniture sale. I went back on another day and someone had tried to force the lid shut and broke the back off.


An army trunk.


A mid-century drafting table/light table/desk with brass fixtures.


And those are just a few of the cool things we spied. They also had three rows of antique theater seats and a couple of sets of lockers that somehow escaped my camera. I'll stop back in this week and snap some pictures for a future post . . . unless you get there to buy them first!

Thanks for reading.

Linking up to:
The Cottage Market

Thursday, May 8, 2014

coffee sack burlap chair reupholstery


You last saw these chairs at Thanksgiving, 2011, when I repainted and upholstered them with some whimsical sheep fabric . . . it lasted a while, but it was pretty dirty and hard to scrub clean.

I recently reupholstered them again with the front and back of a coffee sack for a little change of pace.


Easy as pie, just like last time. You'll want to fold over the edge of your burlap, though, and staple through a couple of layers to keep the burlap from warping or unraveling.


 Here are a few more coffee sack projects I've tackled:

Coffee Sack Tree Skirt
Cushion
Lamp Shade
Wall Art


And here's where you can find a coffee sack or two if you're interested in trying this at home!

Thanks for reading!

Wednesday, March 26, 2014

removing water stains from a dresser

I have a veneered 1928 dresser with Bakelite drawer pulls that I found at a thrift store a really lot of years ago. We were mostly broke at the time, so it was kind of a big deal. It came with a vanity and a headboard, too (which aren't currently in use); I think I carted it home piece by piece in my car? Or maybe I borrowed a truck? It was a lot of years ago. I was really into Bakelite at the time, so I was pretty excited.

Right before we left on our road trip to Montana a year and a half ago, I tipped over a glass of water that had been on top and it splashed and dripped all down the front. The water stains appeared right away. I mopped up all the water, made sure everything in the drawers was dry and in good shape, and hoped that the water stains might dry out and disappear by the time we returned.


But that's not how water stains work, as it turns out. I've just been staring at my ruined treasure since then, wondering whether it was salvageable or whether it'd have to wait until I could pull it out and completely refinish it.

Good news: while cleaning my room, I finally decided to do a little on-line research to see if there was a safe, non-toxic, simple solution that'd tide me over until refinishing. There is!

Denatured alcohol is recommended; as I don't have any of that, I used standard rubbing alcohol from my first aid box. I just poured a little on a wash cloth, and rubbed it on.

I had stared at those water stains for so long, I really didn't expect them to disappear so quickly, but they did. It worked so quickly that I didn't even take the time to run down the hall for my camera; I just snapped some quick photos with my smart phone. (Sorry about that.)


The alcohol took a little of the finish off, too (totally expected), so I followed up with some thorough drying and some paste wax.


Eventually the whole thing needs to be refinished (the shellac, like the shellac on my piano, is starting to crackle), but in the meantime, I don't have to stare at those accusatory water stains anymore. You might be amazed how much that improves the feeling I have when I walk into the bedroom, unless you've got some water stains of your own that you've been staring at for over a year. You will want to try this on your own.

Thanks for stopping in! 

Thursday, March 20, 2014

doll cradle + bedding

Donated to the silent auction at the kiddo's school:


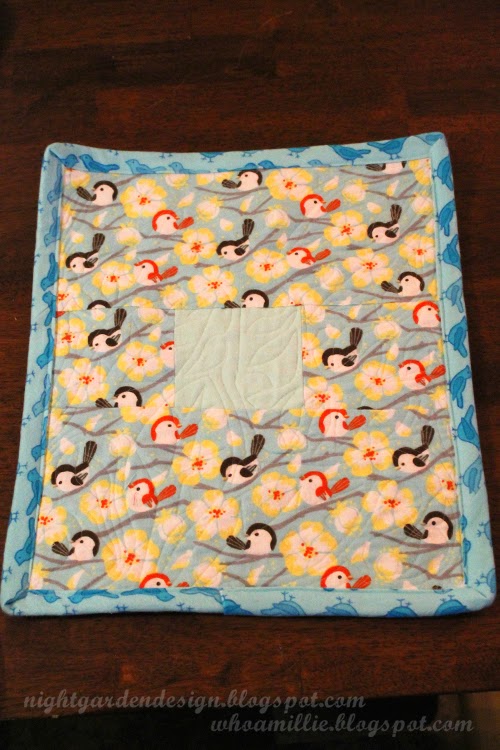
 Birds & Branches flannel doll quilt


Tufted flannel mattress


Pillow and pillowcase


Refinished vintage cradle with leather insets


Yay! It sold!

You can see a previous vintage doll cradle project here. I might make this an annual thing. ;)

p.s. want to see some more detail? click a photo to see a larger version.

Wednesday, January 15, 2014

harmony house credenza

Confession: I bought this Harmony House credenza a year and a half ago. I was so excited, too. It was covered in water rings, had damaged and missing veneer, was splattered with pink nail polish, and needed repair. It was only $9.99 at Value Village and I had a 20% off coupon, making it an incredible steal. Even more incredible now that their furniture prices have gone up.


I was at the register paying for it while a guy was circling it in the furniture area. If I'd been five minutes slower, it would have gone to bidder number two. As it was, he jealously watched the salesperson put a "sold" tag on it and mentioned to me that it was a nice piece, but needed a drawer repair. "I know," I said, "thanks!" I recently spied it's twin on eBay for $575, though in perfect condition.


My goal was to restore it to its former state and resell it, but the original legs were missing. I searched out new legs for it at BRING, found four that almost matched for $1 apiece, and decided that they'd fit the bill. (I'd eventually need to cut off the brass capped ends to make the lengths match. It seriously pained me to do it, but couldn't be helped.)


I poked their threaded rod through a cardboard box to stand them up and start the stripping process.


The messed up drawers and top got stripped at the same time, first with green stripping gel, then with a sanding sponge.


The back of the top had lost its veneer, exposing the particle board (!!!) used for the top, so I ironed on and trimmed some new veneer along the back.


I also had to re-nail the masonite board to the back using little penny nails.


Finally, I started the staining process.


First coat.


The sides had too much damage to the veneer, and sanding too much more would have utterly destroyed it. I took a deep breath and decided to paint the sides and front frame with grey chalk paint.


Here's a nice angle of the freshly finished top.


This shows the stained veneer strip matching up decently to the rest of the edging, the re-nailed back, and the painted side.


Water-ring free top!


The brass hardware needed to be cleaned and refinished.


I don't recommend soaking in the salt/lemon juice mixture recommended on some blogs. All my brass plating sloughed off unevenly.


I used Rub n' Buff to recolor it until I can afford electroplating.


A little bit of sanding at the edges for texture, and some dark colored wax over the finish on the sides.


Finished, with legs reattached!


This is the first time I've refinished a piece this large, and I really like how it turned out. In the end, I moved it into my house rather than trying to resell it. I assume the painted sides, refinished hardware, and inexpert drawer repair make it less valuable (although certainly more attractive than the "before" photo).


Also, now that I know the top is made of particle board, I wouldn't feel right listing it as simply "wood" as the owner of the $575 eBay version does. I mean, technically, that's correct, but I'd expect it to be a plank, not sawdust + glue covered with beautiful veneer. Apparently, this is standard practice in the industry, but if I were the buyer, I'd be pretty surprised to make that kind of a discovery for nearly six-hundred dollars.


Counting the price for the credenza plus the legs, stain, stripper, and sanding sponges, I think I have about $50 into this piece. I think in its current condition I could probably sell it for more than that, but I'm going to hang onto it for awhile for storage. It looks kinda awesome in the spare room.


What do you think?

Thanks for reading!

p.s. you can make these photos larger by clicking on them! take a look at the first one, especially, to see the years of damage that had built up.

linking up to:

Junkin' Joe @Cottage Market

Creative Inspirations

Thrift-a-Saurus

Catch as Catch Can

The Vintage Farmhouse