Monday, July 9, 2012
thrift store finds: white owl cigar box
I found this old White Owl cigar box at a thrift store across town, where I only shop if I happen to be in the neighborhood on another errand. I occasionally have made other good finds over there (a traffic sign, silver platters for my wedding, etc.), but it still hasn't made my list of regular haunts. Too far. But who knows; the kiddo and I have a couple friends we've been visiting on that side of town more regularly lately, so we might start stopping by this store more often.
I liked the owl artwork on this box, the old circus/western mid-century typography, and the customs (?) seal on the front edge. Some industrious child (not mine, for once) has endeavored to make this a Magenta Owl cigar box, but it makes it even more charming, I think. Maybe that's just me.
White Owl Cigars aren't exactly high-end smokes; apparently, they're quite cheap and somewhat disdained by cigar aficionados. I don't think that matters to people making cigar box purses or storing crayons though. As far as the box goes, it's cute, vintage, and functional.
This will likely eventually end up in my Etsy vintage shop, along with some other things I've picked up along the way over the past several months. If you're interested in making it your own before I get around to listing it, send me an e-mail! Until then, it's making the night table in my guest room look even cuter.
Linking up to:
Simple Design's Thrift Haul
Tuesday, July 3, 2012
repurposed faucet handle coat racks & tool racks
This project is one that combines several things that have been popping up on Pinterest lately: chalk paint, old cupboard doors/drawers, and old faucet handles used as hooks. Luckily for me, the two local rebuilding stores and a free paint coupon from Benjamin Moore made this project (which resulted in two coat/tool racks) really inexpensive.
An old cupboard door and drawer front, for example, cost $1 and $1.20 from the Habitat for Humanity Re-Store.
In addition to the boards, I bought a leftover box of unsanded grout at the Re-Store for $1.50. The box also contained a pint of grout sealer and some little square slate tiles, which I'll have to find a project for later. The grout is one of two ingredients in Martha Stewart's chalkboard paint recipe.
Basically, stir 2 Tbsp. unsanded grout into a cup of flat paint. My paint came free with a Benjamin Moore Facebook coupon a couple of months ago. I mixed up a half-recipe (since this project is pretty small), making sure to get rid of as many lumps as possible while stirring.
Most of the directions I've seen for using chalk or chalkboard paint on various blogs say that you don't have to sand down your surface first; I did a brief sanding with 100-grit, because frankly, "no sanding" sounds a little too good to be true.
I let it dry overnight, then sanded the surface with 150 grit sandpaper. The edges got special attention, so that some amount of wood showed there to assist in the "rustic cottage industrial" look I was aiming for.
On the longer of the two racks, I drilled two holes for hanging. Because most modern construction standards require wall studs to be 16 inches apart (on center), and because this rack is for my mom's recently-built house (Happy late Mother's Day, Mom!), the two holes are 16 inches apart.
You can see how, on the back, there is a little splintering from the drill. I knocked down the sharp edges with a bit of sandpaper. You can paint over the exposed wood too, if you want, but I chose not to worry about it, since this is meant to be a rustic piece anyway, and the splintering is on the back.
And these are the "hooks". These faucet handles were 25-cents to 50-cents each at BRING. If you find them still attached to their heavy brass bases, you can expect to pay between $2 and $5 apiece for them (a couple that I bought for the second rack were in this price range, though I went on a sale day and got them for half off). The nuts, with original paint, were $2 a pound, as is most hardware at BRING. (Portland also has a wealth of rebuilding stores, and I know Habitat for Humanity has Re-Stores in most states; check around!)
Beginning assembly. You'll need wood screws between 1.5 and 1.75 inches long, depending on the depth of your handles and nuts, and the thickness of your board. Mark your spots, pre-drill the holes, stack your pieces, and screw everything together.
I prefer that all the handles be different, for the look of something that's been collected and assembled over time. But if you can't find these pieces used for a price you like, you can also buy new outdoor faucet handles for a couple of bucks apiece at the hardware store (at Jerry's here locally, they're $2-3 each).
I also added a layer of beeswax over the top of the paint, since I don't plan to actually use chalk on the chalkboard paint. Also, there was a little more chipping than I like (maybe because I didn't thoroughly sand first?) and I thought the beeswax would probably help seal the finish. I've read some people use paste furniture wax, but I preferred not to buy a can because it's expensive, and I'm not sure I'd use it all before it went bad. The beeswax is something I had on hand.
Cost Breakdown:
(2) boards (an old cupboard door and drawer front); $2.20 total
(8) faucet handles; $6.50 total
(8) large, paint-covered nuts; $2 total
(8) screws; 10 cents ($2 per pound) total
unsanded grout; $1.50 total (with a bunch leftover, plus spare tiles and sealer)
8 oz. paint sample; free, with half leftover
beeswax; $1, if you don't already have some
Total for two coat/tool racks: $13.30, with leftover grout, paint, etc.
Here's a similar project on Apartment Therapy using indoor faucet handles to make a bathroom towel rack/shelf combo.
Here's another from the Our Vintage Home Love blog, in which she uses dowels and rubber gaskets.
And one more from My RePurposed Life, with new handles on the side of a shed.
Thanks for reading! When I find a permanent home for the one we're keeping, I'll post a little blog about it for you. Until then, I'd love to see links for your own repurposing/upcycling projects in the comments section below.
Enjoy your holiday!
(p.s. you can make these photos larger just by clicking on them, but you probably already knew that.)
Linking up to:
Sherry, Katie, Kate, and Michelle
Simple Design's Thrift Haul
Catch as Catch Can at My RePurposed Life
Nifty Thrifty Sundays
The CSI Project
Sunday, July 1, 2012
faux mercury glass vase
Tutorials for faux mercury glass using Krylon Looking Glass Paint are all over the place right now, so I know I'm not exactly breaking new ground here, but I wanted to share a few photos of my experiment with the method anyway.
Clear glass vase from Goodwill, 49 cents. Spray with water (or wash and leave droplets on the interior).
Spray Looking Glass Paint lightly on the inside. It'll be runny. Coverage will be light, but even a little makes the mirror effect evident from the outside. Which is good because it costs $10 for a tiny little can.
Let rest for ten minutes, then spray another light coat. Continue until you have the desired effect. Allow to dry for 24-48 hours.
While mine didn't appear as "aged" as I'd hoped, it did turn out looking much better than before (please ignore that my anniversary flowers are looking a little spent in this next photo).
I looked around to see if I could find out whether people were able to fill their new mercury glass vases with water. It seems like most people are using them as candle holders, but the Martha Stewart tutorial comes closest to addressing the issue by suggesting that you arrange flowers in a water-filled glass, and put that into your mercury vase. Which is what I've done in the last photo.
My experiments with this method aren't finished; I have a couple more ideas which I'll post when I get around to trying them out. Never fear; I will absolutely exhaust you with projects that involve me spray-painting glass. You're welcome.
Thanks for reading! Have you tried this technique yet? I love to check out your (non-spam) links when you post them in the comments below.
p.s. you can make these photos larger just by clicking on them, but you probably already knew that!
Linking up to:
Handy Man, Crafty Woman
Tip Me Tuesday at Tip Junkie
A Bowl Full of Lemons
Mommy by Day, Crafter by Night
Today's Creative Blog
DIY Show Off
The Stuff of Success
Mop it Up Mondays at I Should Be Mopping the Floor
Open House Party at No Minimalist Here
Catch as Catch Can at My Repurposed Life
Simple Design's Thrift Haul
Nifty Thrifty Sundays
Clear glass vase from Goodwill, 49 cents. Spray with water (or wash and leave droplets on the interior).
Spray Looking Glass Paint lightly on the inside. It'll be runny. Coverage will be light, but even a little makes the mirror effect evident from the outside. Which is good because it costs $10 for a tiny little can.
Let rest for ten minutes, then spray another light coat. Continue until you have the desired effect. Allow to dry for 24-48 hours.
While mine didn't appear as "aged" as I'd hoped, it did turn out looking much better than before (please ignore that my anniversary flowers are looking a little spent in this next photo).
I looked around to see if I could find out whether people were able to fill their new mercury glass vases with water. It seems like most people are using them as candle holders, but the Martha Stewart tutorial comes closest to addressing the issue by suggesting that you arrange flowers in a water-filled glass, and put that into your mercury vase. Which is what I've done in the last photo.
My experiments with this method aren't finished; I have a couple more ideas which I'll post when I get around to trying them out. Never fear; I will absolutely exhaust you with projects that involve me spray-painting glass. You're welcome.
Thanks for reading! Have you tried this technique yet? I love to check out your (non-spam) links when you post them in the comments below.
p.s. you can make these photos larger just by clicking on them, but you probably already knew that!
Linking up to:
Handy Man, Crafty Woman
Tip Me Tuesday at Tip Junkie
A Bowl Full of Lemons
Mommy by Day, Crafter by Night
Today's Creative Blog
DIY Show Off
The Stuff of Success
Mop it Up Mondays at I Should Be Mopping the Floor
Open House Party at No Minimalist Here
Catch as Catch Can at My Repurposed Life
Simple Design's Thrift Haul
Nifty Thrifty Sundays
Friday, June 29, 2012
hometown tourist : silver falls state park
"Hometown Tourist" is an occasional series in which I tell tales about our adventures around town, and actually, the whole state of Oregon. Take a peek and come exploring with us!
For Mother's Day weekend, we drove up to Silver Falls State Park. Despite being a life-long Oregonian, I'd never been, though Silver Falls is the largest state park in Oregon and incredibly beautiful. More than 9000 acres in size, it features approximately 25 miles of trails for hikers, bicyclists, and horseback riders (though not all on the same trail).
It also offers clean campgrounds and cabins for campers. Here's where we stayed.
Cabins are divided into two rooms, with a living area in front (with fold-down futon) and a bedroom in back (with built-in bunk beds and a queen bed, all with vinyl-covered mattresses). You could easily sleep six people here, but we'd recommend you bring a drill or screwdriver, as all but the built-in bunk beds are super-squeaky due to loose screws.
Our picnic area, complete with long picnic table and metal fire hoop.
The old red water pump (shared between cabins).
There's a shared bathroom/shower building nearby, too, so there's no woods-squatting required, and hikers can get cleaned up at the end of the day.
We were surrounded on all sides (as is usual in Oregon's boreal forests) by tall cedars and douglas firs, and shrubs in a thousand colors of green.
The park was established in the 1930s thanks to the work of photographer June Drake; the lodge (shown here from behind) was built as part of President FDR's Works Progress Administration's Civilian Conservation Corps. It no longer hosts overnight guests.
Inside the dining room, the original myrtle wood tables are still extant. The only food served at the lodge anymore, though, is summer snack stand food; burgers, fries, ice cream bars, etc. Mother's Day weekend hosts a plant and bird show so the tables weren't useable for dining while we were there, but may be usually.
Photographs of and by photographer June Drake feature prominently on the wall by the snack bar.
Spring fiddleheads on ferns outside the lodge.
Ah! At last! A waterfall! The North and South Forks of Silver Creek feed the falls, of which there are ten (major) within the bounds of the park (and you can reach them all by following the Trail of Ten Falls on an 8+ mile hike).
The first, right off the parking area by the lodge (and the separate 1930s gift shop called the Nature Store), is South Falls.
It's a spectacular introduction to Silver Falls State Park, falling 177 feet to a pool beneath. The trail starts at the top of the vertigo-inducing descent . . .
. . . then winds down the side of the gorge and leads behind the falls.
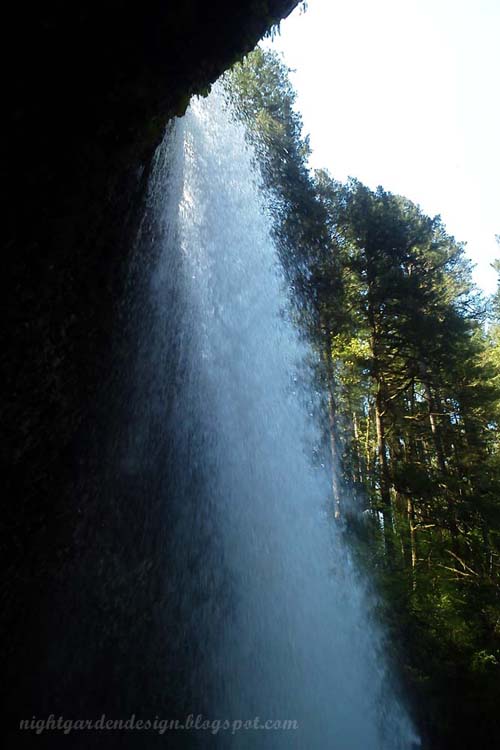
You pass behind a massive curtain of water, protected by a metal rail (hold tight to your bebes!). The overhanging cliff drips and sweats overhead.
The trail is narrow and not passable by stroller, wheelchair, bike, or horse at this point, although many of the falls are viewable from overlooks along the road, or along other trails. Here's a link to a pdf brochure that can help you plan.
A little more than a mile away along the trail is Lower South Falls.
Lower South Falls is shorter (at 93 feet), but the trail is more treacherous; the path suddenly leads down a steep, lightly-maintained staircase of stone steps (probably also built in the 1930s), edged by a railing of varying degrees of undependability. Seriously, hold tight to your bebes, and don't lean against the railing. (Make these photographs larger by clicking on them, and you can see part of the staircase in the previous photograph) The trail also leads behind Lower South Falls, the second of three falls along the trail with this feature.
Shortly after we passed Lower South Falls, my nearly-forty-pound two-year-old fell asleep in my arms, and became a dead weight I carried up the steeply sloping Maple Ridge Trail. This "shortcut" back to the trailhead and lodge seems interminable though only about a mile, because of the 30-45 degree slope. The kiddo woke up at the top of the hill, of course, and wouldn't nap again. We crossed a short bridge over Silver Creek and spotted this picnic shelter.
Upriver near the campground, close to the swimming area and a small playground, I photographed the exterior of the WPA lodge-style bathrooms in the late afternoon sun.
The next day, we scrapped the idea of starting over and walking the entire trail, and drove up the main road a little ways till we found the Winter Trail trailhead near Winter Falls.
After geeking out a little over the similarity to Winterfell (the name of the castle of the Stark family in Game of Thrones . . . yeah, we're nerds), we hiked down a zig-zagging trail to the bottom of the fall, which is approximately 134 feet down . . .
. . . and took a family portrait with my Commando phone near the pool at the base.
We hiked back up (except for one of us, who was carried aloft like a tiny, lazy prince) to the top, and drove a little ways further up the road to the parking area near the North Falls trailhead.
There was a bit of a hike to North Falls, and the narrow trail closely hugs the overhanging cliff. The scenery is mostly green, and the water gushes close by at all times.
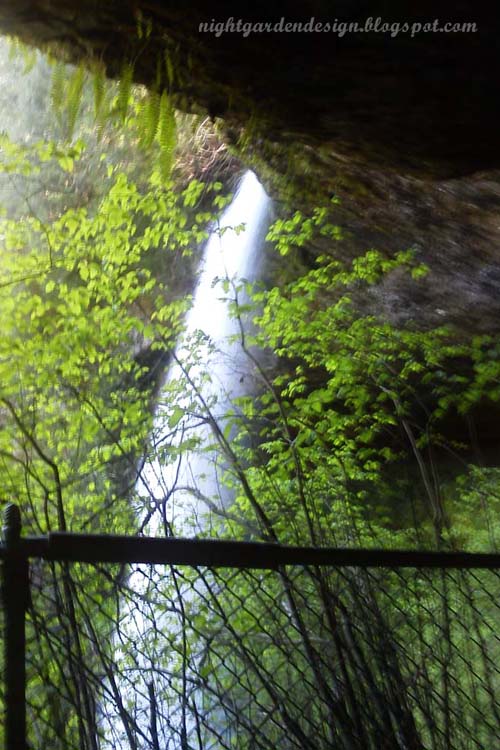
Again, the trail is bordered by a railing of questionable stability and, along one length, a bit of chain link fencing. It spits out suddenly over a deep overhang. Yes, North Falls is the third and final waterfall that the trail passes behind. But . . .
. . . at the bottom of another old staircase and down a slippery mud trail, you'll notice in this photo that there's no railing here. The trail is narrow and slippery at the top of a steep, muddy slope. Though there is a bench there (labelled; click the photo to zoom), the kiddo and I didn't brave this one. We stayed back while the Mister went to check it out . . . and reported back that it was a freaky as it looked.
Still, it was pretty enough behind the chain link, from our perspective. We hiked back up the staircase and back to the car.
I was unable to convince the guys to follow me on another mini-hike, so I begged off for a quick, short, quarter-mile hike from the car to Upper North Falls. This was the easiest bit of trail yet, and yielded a secluded 65-foot waterfall and a large, calm pool.
Yes, Upper North Falls is 65-feet tall, which means the fallen timber on the left side is taller than that. It's probably hard to get the right perspective from photographs. Imagine ten tall men standing on top of one another; that's how tall Upper North Falls is.
Sans baby and husband to make me look legit, the vacationing family posing by a smaller, unnamed waterfall wouldn't accept my offer to take a photo of all three of them together. Or rather, the father wouldn't. The mom totally wanted to be in the photo with her husband and daughter, but it was probably too expensive a camera to hand over to a stranger. Even on a dead-end trail. I contented myself with more fiddleheads.
And then we were on our way home. We passed by a glaring yellow field on the way towards Salem, and just like that, we were away!
So we checked five of the ten waterfalls off our list, and I plan to go back when I can count on my kiddo to walk most of the way, and not go sliding off the side of the trail. (I can literally worry about anything. Try me.)
I definitely recommend Silver Falls State Park as a day trip; even better if you're into hiking and can snag a campsite or cabin before they fill up (hint: make reservations waaaaay in advance). Keep a close eye (and a pair of strong hands) on your kiddo at all times, though, as there are lots of steep drops and difficult bits of trail.
Have you been playing hometown tourist in your neck of the woods lately? I'd love to follow your (non-spam) links in the comments section below. Thanks for reading!
p.s. you can make these photos larger just by clicking on them, but you probably already knew that.)
For Mother's Day weekend, we drove up to Silver Falls State Park. Despite being a life-long Oregonian, I'd never been, though Silver Falls is the largest state park in Oregon and incredibly beautiful. More than 9000 acres in size, it features approximately 25 miles of trails for hikers, bicyclists, and horseback riders (though not all on the same trail).
It also offers clean campgrounds and cabins for campers. Here's where we stayed.
Cabins are divided into two rooms, with a living area in front (with fold-down futon) and a bedroom in back (with built-in bunk beds and a queen bed, all with vinyl-covered mattresses). You could easily sleep six people here, but we'd recommend you bring a drill or screwdriver, as all but the built-in bunk beds are super-squeaky due to loose screws.
Our picnic area, complete with long picnic table and metal fire hoop.
The old red water pump (shared between cabins).
There's a shared bathroom/shower building nearby, too, so there's no woods-squatting required, and hikers can get cleaned up at the end of the day.
We were surrounded on all sides (as is usual in Oregon's boreal forests) by tall cedars and douglas firs, and shrubs in a thousand colors of green.
The park was established in the 1930s thanks to the work of photographer June Drake; the lodge (shown here from behind) was built as part of President FDR's Works Progress Administration's Civilian Conservation Corps. It no longer hosts overnight guests.
Inside the dining room, the original myrtle wood tables are still extant. The only food served at the lodge anymore, though, is summer snack stand food; burgers, fries, ice cream bars, etc. Mother's Day weekend hosts a plant and bird show so the tables weren't useable for dining while we were there, but may be usually.
Photographs of and by photographer June Drake feature prominently on the wall by the snack bar.
Spring fiddleheads on ferns outside the lodge.
Ah! At last! A waterfall! The North and South Forks of Silver Creek feed the falls, of which there are ten (major) within the bounds of the park (and you can reach them all by following the Trail of Ten Falls on an 8+ mile hike).
The first, right off the parking area by the lodge (and the separate 1930s gift shop called the Nature Store), is South Falls.
It's a spectacular introduction to Silver Falls State Park, falling 177 feet to a pool beneath. The trail starts at the top of the vertigo-inducing descent . . .
. . . then winds down the side of the gorge and leads behind the falls.
You pass behind a massive curtain of water, protected by a metal rail (hold tight to your bebes!). The overhanging cliff drips and sweats overhead.
The trail is narrow and not passable by stroller, wheelchair, bike, or horse at this point, although many of the falls are viewable from overlooks along the road, or along other trails. Here's a link to a pdf brochure that can help you plan.
A little more than a mile away along the trail is Lower South Falls.
Lower South Falls is shorter (at 93 feet), but the trail is more treacherous; the path suddenly leads down a steep, lightly-maintained staircase of stone steps (probably also built in the 1930s), edged by a railing of varying degrees of undependability. Seriously, hold tight to your bebes, and don't lean against the railing. (Make these photographs larger by clicking on them, and you can see part of the staircase in the previous photograph) The trail also leads behind Lower South Falls, the second of three falls along the trail with this feature.
Shortly after we passed Lower South Falls, my nearly-forty-pound two-year-old fell asleep in my arms, and became a dead weight I carried up the steeply sloping Maple Ridge Trail. This "shortcut" back to the trailhead and lodge seems interminable though only about a mile, because of the 30-45 degree slope. The kiddo woke up at the top of the hill, of course, and wouldn't nap again. We crossed a short bridge over Silver Creek and spotted this picnic shelter.
Upriver near the campground, close to the swimming area and a small playground, I photographed the exterior of the WPA lodge-style bathrooms in the late afternoon sun.
The next day, we scrapped the idea of starting over and walking the entire trail, and drove up the main road a little ways till we found the Winter Trail trailhead near Winter Falls.
After geeking out a little over the similarity to Winterfell (the name of the castle of the Stark family in Game of Thrones . . . yeah, we're nerds), we hiked down a zig-zagging trail to the bottom of the fall, which is approximately 134 feet down . . .
. . . and took a family portrait with my Commando phone near the pool at the base.
We hiked back up (except for one of us, who was carried aloft like a tiny, lazy prince) to the top, and drove a little ways further up the road to the parking area near the North Falls trailhead.
There was a bit of a hike to North Falls, and the narrow trail closely hugs the overhanging cliff. The scenery is mostly green, and the water gushes close by at all times.
Again, the trail is bordered by a railing of questionable stability and, along one length, a bit of chain link fencing. It spits out suddenly over a deep overhang. Yes, North Falls is the third and final waterfall that the trail passes behind. But . . .
. . . at the bottom of another old staircase and down a slippery mud trail, you'll notice in this photo that there's no railing here. The trail is narrow and slippery at the top of a steep, muddy slope. Though there is a bench there (labelled; click the photo to zoom), the kiddo and I didn't brave this one. We stayed back while the Mister went to check it out . . . and reported back that it was a freaky as it looked.
Still, it was pretty enough behind the chain link, from our perspective. We hiked back up the staircase and back to the car.
I was unable to convince the guys to follow me on another mini-hike, so I begged off for a quick, short, quarter-mile hike from the car to Upper North Falls. This was the easiest bit of trail yet, and yielded a secluded 65-foot waterfall and a large, calm pool.
Yes, Upper North Falls is 65-feet tall, which means the fallen timber on the left side is taller than that. It's probably hard to get the right perspective from photographs. Imagine ten tall men standing on top of one another; that's how tall Upper North Falls is.
Sans baby and husband to make me look legit, the vacationing family posing by a smaller, unnamed waterfall wouldn't accept my offer to take a photo of all three of them together. Or rather, the father wouldn't. The mom totally wanted to be in the photo with her husband and daughter, but it was probably too expensive a camera to hand over to a stranger. Even on a dead-end trail. I contented myself with more fiddleheads.
And then we were on our way home. We passed by a glaring yellow field on the way towards Salem, and just like that, we were away!
So we checked five of the ten waterfalls off our list, and I plan to go back when I can count on my kiddo to walk most of the way, and not go sliding off the side of the trail. (I can literally worry about anything. Try me.)
I definitely recommend Silver Falls State Park as a day trip; even better if you're into hiking and can snag a campsite or cabin before they fill up (hint: make reservations waaaaay in advance). Keep a close eye (and a pair of strong hands) on your kiddo at all times, though, as there are lots of steep drops and difficult bits of trail.
Have you been playing hometown tourist in your neck of the woods lately? I'd love to follow your (non-spam) links in the comments section below. Thanks for reading!
p.s. you can make these photos larger just by clicking on them, but you probably already knew that.)
Wednesday, June 27, 2012
butterfly specimen placeholder art
These frames are the best option we found for framing our monthly photo booth strips (something we started doing regularly about the time of the kiddo's first birthday, but only occasionally before then).
Afraid they'd stop carrying these glass-backed frames, I bought ahead and ended up with an empty frame on my wall. I decided to fill the empty one with some placeholder art until we have photo strips to fill that frame as well. (The glass-backed frames I used for this project are available from Target.)
This is a deceptively easy project. Find some butterfly art in a magazine or as a copyright-free image on-line. Print it out.
Cut carefully. Make sure your cuts aren't too straight or choppy, for the most naturalistic appearance possible. Go ahead and cut off the antennae.
Gather a spool of heavy thread, some double-sided tape, and your butterfly.
Cut a length of thread. Bend and twist at the center, and attach to the back of your cut-out butterfly using a tiny piece of the tape (this will also loosely hold the butterfly to the back pane of glass to help avoid slippage).
Flip over and check placement. Adjust if necessary.
Place in frame, sandwiching the butterflies between two pieces of glass.
I used three different butterflies to mimic the look of a specimen collection; you could switch it up even more and use three different colors of butterflies, or a dozen in different shapes and sizes.
The thread antennae give these a very realistic appearance, especially if you just let them lay, rather than adjusting them until they're perfectly symmetrical.
And in less than a typical nap period, it's done, and ready to hang on your wall . . . permanently, or until something better comes along!
Thanks for reading!
p.s. you can make these pictures larger just by clicking on them, but you probably already knew that.
Linking up to:
Handy Man, Crafty Woman
Tip Me Tuesday at Tip Junkie
A Bowl Full of Lemons
Mommy by Day, Crafter by Night
Today's Creative Blog
DIY Show Off
The Stuff of Success
Mop it Up Mondays at I Should Be Mopping the Floor
Open House Party at No Minimalist Here
Catch as Catch Can at My Repurposed Life
Subscribe to:
Posts (Atom)