If you have a preschool-aged kid (or older) with an interest in recycling, this is a fun afternoon project! Let's make some paper!
Take scrap paper and, with your kid, tear it up and put it in a blender with some hot water. We used a couple of mis-printed sheets from the printer, a bit of cardboard, two pieces of junk mail, and a sheet of purple construction paper. The trick is: the blender blades have to turn freely, so don't jam-pack the blender and use lots of water.
Blend till pulpy.
Kids can pour into the screen! We actually did the pouring over a catch-basin, then moved it to the table.
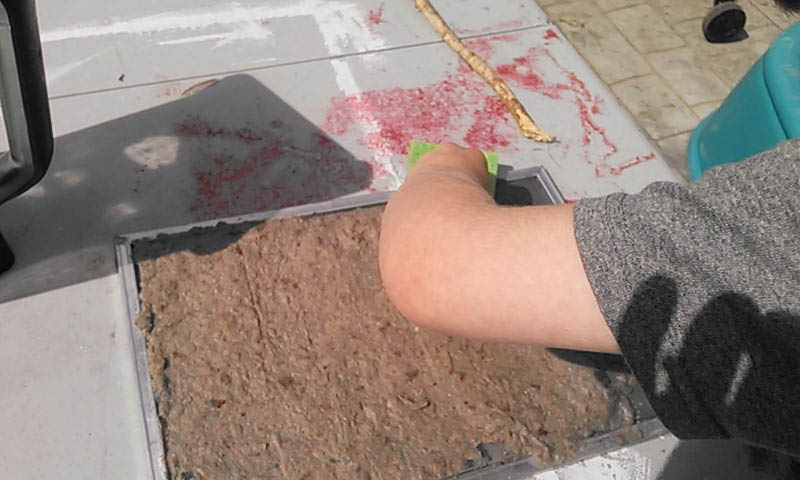
Kids can sponge gently to remove excess water. Here, my now-gigantic, soon-to-be-kindergartener kiddo sponges our screened paper.
Flip it over on felt, polyester, or polypropylene cloth (heck, linen would probably work, too), then press from the back with a sponge (kids can do this part, too!) (The kiddo is developing his photography skills; these are nicely framed, I think.)
Carefully lift screen, helping paper separate by pulling gently on the corner. Once the entire screen is separated from the paper, leave it to dry.
And once it's dry, you can cut it into two equal pieces . . . or more.
The resulting paper will vary in thickness and texture, depending on your pour, and color, depending on your source materials. Ours feels a little like egg carton cardboard.
Nice textural quality; the screen leaves crosshatch marks on the surface, which look great when rubbed with a crayon.
And that's all there is to it! The materials used don't have to be expensive. We used a small window screen from the recycled building materials store (99 cents), some kitchen sponges, and a polypropylene sack. Serviceable and fun for a summer project!
We're going to try this at the preschool's day camp this month, too, but using hand mixers; the low-tech kind with a hand crank (go go fine motor skills!). I'll try to remember to post the results for those who want to give it a try!
Thanks for stopping by!
-a


