Friday, April 27, 2012

bedspring trellis + shipping crate planters

Here's a little story about a project using recycled materials and inspiration from Bring.

You might remember that the last time I wrote about Bring, some of the items I'd considered bringing home were these beat up old shipping crates, which I imagined would be awesome as movie props.


You might further remember that they were free, which made them a pretty good deal, considering that the hinges and handles cost a couple of bucks apiece at the hardware store. Since I was in the market for some gate hinges anyway, I ended up going back and picking up a couple of the crates after all. In the end, I needed a couple of planters for a little area of my yard that's been neglected.


Why, here's that neglected area of the yard right now! It is terrible. Weeds, chain link fencing (I hate chain link fencing), old windows leaning against the carport . . .


And here it is, looking better already, after I removed the chain link from the front, weeded (you can see my yard waste bin filled to the brim in the foreground), and put two treated fence posts in place.


Your next question might be, "Why do you need posts for planters?" Well, I don't. But since I took down the chain link fencing and planned to use the alley space to store my recycling cans, I wanted to put in a recycled trellis and some vines to keep that area of our yard private and somewhat secure. So I moved back the fence line about six feet, and used our post-hole digger to dig two post holes about 18 inches deep. Luckily, the ground was soft from recent rains, so digging only took an hour or so during the kiddo's nap time. Then I put the treated timbers into the holes. (I used treated timbers to help prevent damage from rot and termites.)


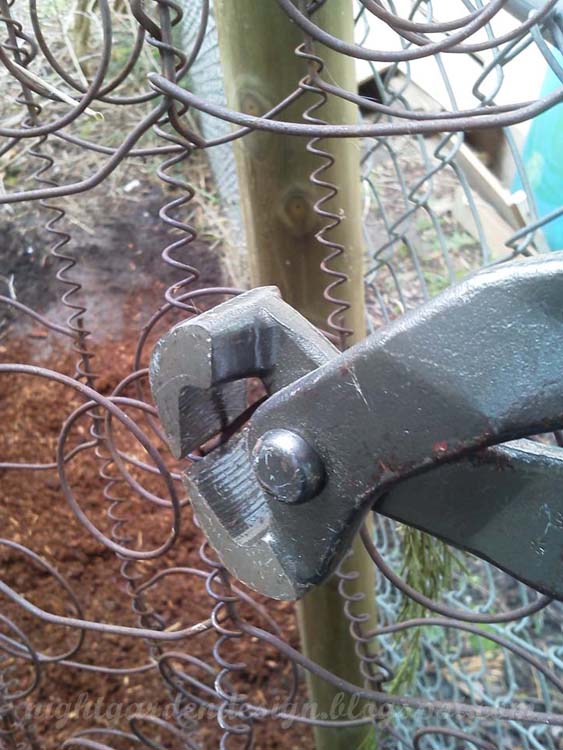
Next, I used my handy-dandy heavy duty wire cutters (which I also used to remove the chain link) to trim down my bed spring. Yes, I said bed spring. I've had this sucker sitting around for awhile, another inspiration from Bring, where they use them as trellises, and sell them for that purpose, too.


Then I used zip ties to temporarily attach the bedspring to the fence timbers. The posts sandwiched perfectly between the outer edges of the springs.


Here's what it looked like, temporarily held in place by zip ties. This is a good way to make sure your posts stay the right distance apart before you permanently set them in place . . .


. . . using Sakrete. I used one-and-a-half 60-pound sacks. Since the ground was already wet, I just poured the dry concrete into the holes and added a little water to the top. Then I let them set for a couple of days, so that I wouldn't upset them if they got bumped or knocked around.


Getting back to the crates, here they are in front of the trellis-in-progress. Looking funky and old.


I had my husband remove the lids for me. We set those aside so I could take the hinges off later for my gate project.


Then, I drilled some holes in the bottom for drainage.


This isn't the best picture, but it shows five holes in the middle and three holes along each edge of the bottom of the crate, drilled with a 1/2-inch drill bit.


Then I took off the remaining bits of box labels and staples, and hit the outsides of the crates with a palm sander. You can tell the one on the left has been sanded, while the one on the right still needs a little 60 grit.


Late last year, I picked up this free sample jar of Arborcoat in a cedar color, using a coupon off of Benjamin Moore's Facebook page. It's good stuff for exterior areas; I used it to coat the benches of our picnic table, but primed the top to receive paint; the primer, this spring, is all peeling, but the Arborcoat held up to a fall, winter, and early spring of heavy rains. Anyway, I had some leftover, so I used it on these planters.


First coat.


Second coat.


Here they are in place, stained and ready to fill. They sat overnight to let the stain set.


I had a plant pot full of pea gravel from a bottle tree I got rid of, so I used the now-recycled pea gravel to fill in the bottoms of the planters to aid in drainage.


I added dirt, evergreen clematis vines, and bark mulch. You might notice something else is different, too!


In those earlier shots that there are some big old windows leaning at an angle against the side of the carport, behind the trellis. Here, I'll show you an earlier shot so you don't have to scroll back.


BEFORE:


AFTER:


Luckily, I hadn't wired the bedspring in place yet, so I just clipped the zip ties on one side and pivoted the trellis out of the way while I dragged the old windows out of the alley and into the driveway.

A couple of caveats: because I don't know what, exactly, was shipped in those crates (or whether they'd been treated with anything), I decided it was safest not to plant food plants in them. The evergreen clematis was specially selected for it's climbing habit, but also because it can take part sun/part shade and remains green all year long (unlike regular clematis, which dies off in winter).

I also ended up digging out some space beneath the planters to put in some old pavers we had leftover from tearing out the broken fireplace. This was because, when I moved the old windows, the frames had begun to rot and there was some insect damage, and I really didn't want my planters meeting a similar fate. It's best to keep wood off of the ground.

Thanks for dropping by! I'd love to see your recycled projects, too! Give me a link in the comments section if you have something to share.

(p.s. you can make these photos bigger by clicking on them . . . but you probably knew that!)


Linking up to:

Visit thecsiproject.com

Monday, April 23, 2012

flannel projects - - part one : floor pouf

I always seem to have a few patterns of flannel laying around, partly because I bought a bunch when I was making cloth diapers before the kiddo was born, and partly because I bought some more when I figured out how to make flannel crib sheets (coming up in a future post).

This project, however, uses the owl print flannel that my aunt used to wrap up Little Owl Lost for the little guy's birthday this year. My aunt is a long-time recycler who often uses fabric to wrap gifts (and often gives books. Yay!).

All of the fabrics pictured in the first photo are from Joann Fabrics; I'm having difficulty finding the owl fabric on-line, though, so it might be a discontinued print. Really, you can use almost any fabric for this project, from flannel to upholstery fabric to suede, depending on what you have on-hand.


I decided to make a floor pouf after seeing Sherry over at Young House Love make one based on this tutorial from Living with Punks. And I have to say, it was just as quick and easy as it looked, including the piping!


Now, I should mention, I've had limited adventures with piping in the past. But having the how-to spelled out for me made it look kind of awesome, I think.


We skipped the handle since cotton flannel is kind of a thin fabric, prone to tearing when rough-handled. I'd rather the kiddo pick the whole thing up to move it, and the pouf is light enough that the lack of handle isn't an issue.


And there you have it! One cute owl pouf made from gift-wrap flannel. The kiddo likes to tackle it, but it also makes a great stool, pillow, and foot rest.

Takes about an hour and a half from start to finish, and since I made ours about 24 inches across and about twelve inches tall, it took about two yards of 42-inch flannel to make.

I'd love to see if you tackle this pouf project too! Link in the comments if you want to share photos.

(p.s. you can make these photos bigger by clicking on them . . . but you probably knew that!)


Sunday, April 22, 2012

all - time top and bottom five posts -- part one

The Blogger "stats" layout is a really handy way to feed my obsessive compulsive tendencies. I can check on how many hits per day/week/month my blog is getting, what countries the hits are coming from, and what URLs are referring people to my blog. I can also see which individual blog entries are drawing the most (and least) traffic.

This is both interesting (to my stats-obsessed mind) and informative (in that it lets me know what readers might be interested in, how they're finding my blog, and where I should focus more/less of my time and energy).

So here's a little glimpse at my top and bottom five all-time posts, and a little of my thought process into figuring out why certain entries are doing so much better than others.

#1: Skyrim Birthday Cake


This is a fairly recent blog entry featuring a birthday cake I made for my husband's birthday last fall, based on a video game (Skyrim) he was playing frequently at the time. It shows up pretty high on a Google search for Skyrim cakes, but I know the cake everyone is really after is this one by Charm City Cakes. It's also of a dragon perched on a rock, but their dragon is incredibly skillfully made and detailed, whereas mine is . . . well, you know the saying about how if you can't say anything nice, don't leave any blog comments? Yeah, me too.

#2: Spoon Sunburst Mirror


I completed this project for the Young House Love/Bower Power Pinterest challenge back in August, and they're still my number one and two sources of hits for this project. Pinterest is right up there in the top five, as well. I've checked recently and this project has been repinned in the neighborhood of 40 times (to find out what's being pinned from your website or blog, use this:

http://pinterest.com/source/nightgardendesign.blogspot.com/

replacing your URL for mine).


#3: Delusions of Grandeur


This one is all about the Vault Boy cake. For certain. Because I always have "Vault Boy Cake" and "Fallout Cake" pop up on my list of Google searches that direct people to my blog. Again, my cake posts get a lot of traffic, but not many comments. But I hope they're inspiring some people, despite that trend!

#4: New Year, New Things to Love!


Due to the overwhelming popularity of those matryoshka measuring cups , and the single solitary sale on yardage for my shorts design, I'm calling this one for the Russians.

#5: Lampshade Re-Do with Upcycled Milk Jug


This one is still one of my favorite projects and blog entries, and has also made an appearance on Pinterest. I think it's been popular because of its use of plastic milk jugs, and because it's a lighting project (which tend to do pretty well across the board).

So there you have the top five all-time blog entries on the Night Garden Blog! Stay tuned for an entry coming up about the bottom five all-time blog entries. Guaranteed to show you a few you haven't seen yet!

(p.s. you can make these photos bigger by clicking on them . . . but you probably knew that!)


Thursday, April 19, 2012

sneak peek of upcoming projects

Here are a few sneak peeks of upcoming projects, via Instagram for Android:


(p.s. you can make these photos bigger by clicking on them . . . but you probably knew that!)


Tuesday, April 17, 2012

two new spoonflower fabric designs

Spoonflower's hosted a couple of fabric design contests lately that were right up my alley. First up, designs inspired by a love of books.

Assuming there'd be a ton of bookshelf designs, book stacks, etc., I looked back over my history with books, a history that begins with a story my mom tells about tiny little me, in my crib, quietly looking at picture books. Now, I worked through most of my twenties (and the beginning of my thirties) in bookstores (and the past several years designing book covers), but as a kid, I was a pretty constant library patron.

When I got old enough to walk the eight or so blocks after school, we used to spend a couple of hours a day at the public library until our dad could pick us up. Hours we spent spinning the globe, looking up swear words in the dictionary, and, of course, reading. And during that time, I encountered thousands of these library checkout slips. And probably thousands more at the school library, too.


Click here for the full design, featuring four different YA library slips created in Illustrator and Photoshop, without the aid of scans. In fact, created without the aid of my drawing tablet, too, since I couldn't find the pen. Each of the kids' signatures were done using different Photoshop brushes and my mouse. And I think I used either three or four open typewriter-style fonts.

I placed 22nd out of 143, which is cool with me.

Next up was the "Sewing Celebration" contest. Again, I mined my happiest childhood memories. My kindergarten teacher had a shelf full of fun kits that kids could take home to make a little project or do a little activity. Among the dozens I must have taken home, I remember best a little felt bean bag I stitched together with red yarn.

The kit included chartreuse green felt, red yarn, pins, needles, and beans. And my stitches were so huge that the beans would sometimes slip out from between them. I've become a better sewist over the years (luckily, 'cause I was losing a whole lot of beans), and my five-year-old self could never have imagined something as fabulous as Spoonflower, but she would have loved it. And so would my kindergarten teacher.


Click here for the full design. I think you can even still vote, if you're interested, for a couple more hours. Contest results tba!


(p.s. you can make these photos bigger by clicking on them . . . but you probably knew that!)

Monday, April 16, 2012

bright red book racks go faster

We have a bit of a book storage issue around these parts. Not only do I still have some of my childhood books hanging around, but I've collected illustrated kids books since my late teens . . . and things went from bad to worse when I started working in bookstores when I was twenty-one (a bookstore discount is a dangerous thing). And then, when you add in the kiddo's books and my husband's collection, the place has been pretty packed.

I actually have culled things down quite a bit in the past year or so, getting rid of between 10 and 20 percent of my own book collection (not counting the illustrated books, which I've passed on to the little dude). But still. Books everywhere. Which I like, but I've been searching for new solutions. Pinterest abounds with ideas on book storage, and I've tried a few different ones (which I'll share in different posts coming up). Today, though, I want to share this one with you.

First, I found a beat up old magazine rack on 1/2-off day at St. Vincent dePaul's (actually, I found two. I'll share the second with you in another post).


I sanded it lightly and then wiped it down with a little deglosser.


I hit the bottom with some cherry red spray paint, the after it dried, put three light coats on the top and sides.


Because it was raining or humid all week, I left it outside to de-fume for three days, then brought it inside to cure for another three days before finally filling it with books.


Now it's prettier, and, as everyone knows, anything red is automatically faster. It also handily wrangles a dozen often-requested books face out, so they're easy to find.

Thanks for stopping in! If you've seen some other awesome book storage ideas, you can post them in the comments section and I'll add them to my book storage pin board.

(p.s. you can make these photos bigger by clicking on them . . . but you probably knew that!)


Linking up to:

mop it up mondays feature

Our Delightful Home

Visit thecsiproject.com


Saturday, April 14, 2012

post - easter peeps

Just a quick little front door upgrade and a little story to share with you.


We hadn't quite gotten around to putting a peep hole on the front door since replacing the door two years ago, and generally, I have been peeking through the front curtain or pretending not to be home if I wasn't expecting a delivery person.

Well, the Friday before Easter, my dad and stepmom were going to be coming through town and wanted to pop in to see the kiddo and me. A phone call let me know they were just a couple of miles outside of town, so we finished straightening up, and heard the knock of their arrival.

Or so I thought. I peeked through the door chain and saw the angle of a jaw that somewhat resembled my dad's, but when I actually opened the door, it was random neighbor X peering through the screen door, wanting to know if he could take the little desk we had put out by the trashcans. I said yes, of course.

In my head, though, I was silently cursing myself. It could literally have been anyone out there, and I had put myself and my kid in danger by not having a stupid peep hole on the front door.

Well, enough of that. I took care of Mission Peep Hole today. It was fast, it looks pretty good, and it only cost a couple of bucks.

In fact, since we'd actually had the peep hole kit sitting in a kitchen drawer for the past two years, I didn't shell out a dime today.

Step one: Drill a hole through your door at about eye-height. Our peep hole kit specified a 1/2-inch hole.


Step two: Pop in the front half of your peep hole and notice how there's a lot of splintered door peeping out behind the eyepiece. There's some showing on the other side of the door, too. Swear under your breath.


Step three: Remember you have a little drawer full of old washers, gears, and other nifty metal findings. Find some with holes that are about half-inch across and add them to the peep hole stems before screwing them together through the hole.


Step four: Try it out! I had the kiddo try mine out for me, while the mister made faces on the other side. Giggles ahoy.

Here's the full door from the outside, underneath a climbing kiwi vine that's proving it's spring.


Hooray for finishing quick projects that make a world of difference! Hooray for nice weather that makes me want to get outside and get stuff done! Hooray for spring!


Thanks for stopping by! I'd love it if you left me a comment below, letting me know what quick fixes you might be working on this spring.

(p.s. you can make these photos bigger by clicking on them . . . but you probably knew that!)


Linking up to:

mop it up mondays


Chic on a Shoestring Decorating

Our Delightful Home

Visit thecsiproject.com