Awhile back, one of the cats knocked down my very tippy lamp, breaking the amber glass bowl shade. I never could find a replacement with a properly sized hole, although I'm sure they exist somewhere.

I thought about getting a bowl and a glass-cutting hole bit for the drill and just cutting my own to fit. WIth cats still on the prowl, I figured at that point I was probably just
begging for another broken shade. Instead (inspired by
THIS article), I decided to use the translucent plastic of a plastic milk jug to make my own.

I didn't create a polygonal shade like the article describes, but drew inspiration from the use of materials. I really thought that my lamp needed to be a glowing flower (the stem!).

Here's how I did it: From a piece of the milk plastic I cut a petal shape that was approximately the size I envisioned for the lamp. My petals vary in size from 4-7 inches long and from two to four inches wide (but yours could be narrower and longer for a daisy or chrysanthemum!).
By tracing the nut that held the old shade in place, and with some trial and error, I cut one end of the petal to fit in place around the lamp socket.

Keeping this template in mind, I cut 12 petal shapes from milk jug plastic (from two milk jugs). I avoided the sections with hard edges, but cut a nice combination of flat and gently curved pieces.
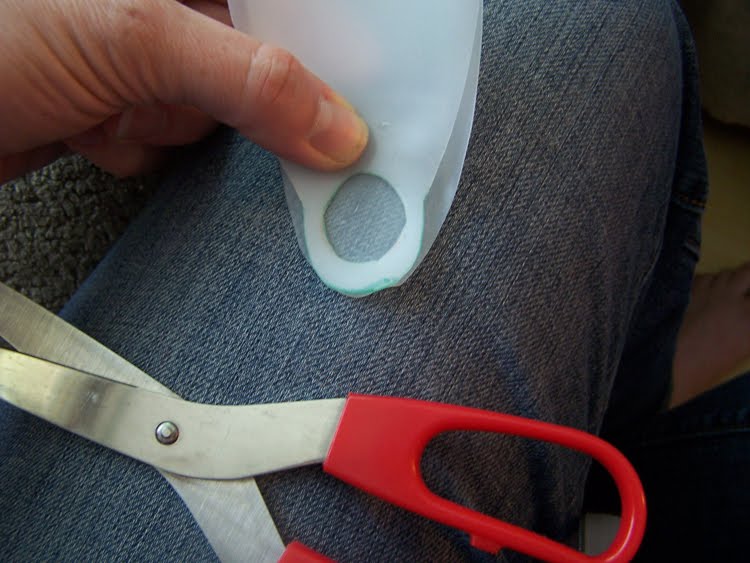
Using my template, I traced the socket-compatible end onto one end of my petals. I used a hole punch to start the center holes, then cut around them with scissors.


I fit several of the flatter petals over the lamp socket.


As I worked around the center, building my flower, I added the more-curved petals so that the flower would cup upwards toward the center.


Lastly, I replaced the nut to hold all of the petals in place, and put in a new (very low wattage) bulb.

Ta-dum! A lamp that looks like a flower!

After the fact, I noticed how strongly it resembles a
book cover I designed awhile back at Wipf and Stock:

Funny how an image can stick to your subconscious.
If you use these directions to create your own lampshade, I'd love to see!
I think this project would also work really well for small pendant shades; just make sure to use very low-wattage bulbs. Materials used in commercial shades are rated for use near lightbulbs, but when you make your own, from whatever material, things can become questionable. That said, I've had a milk plastic shade on my lamp for over a year, without incident, because I use a teensy little low-wattage bulb. Enjoy!
Linking up to: